|
I can shoot that picture in one lens, Tom Before usable zooms, a common question was how many lenses you needed to shoot most pictures. If you were using a rangefinder camera in the early 1960s, you might be carrying a 35mm and a 90mm. You got a mild wide angle and short telephoto, and you could do street shots, landscapes and portraits pretty easily.  La Cieneguilla Petroglyph Site near Santa Fe, NM Fuji X-E2, 35mm f/2 Summicron-M ASPH As 35mm film and single lens reflex (SLR) cameras began to dominate photography in the early 1970s, you were usually sold a 50mm f/1.8 ‘normal’ lens with your new SLR camera. These lenses gave you the same 45 degree field of view your eyes supposedly took in at a glance. Relatively simple to design and build, they were cheap too. 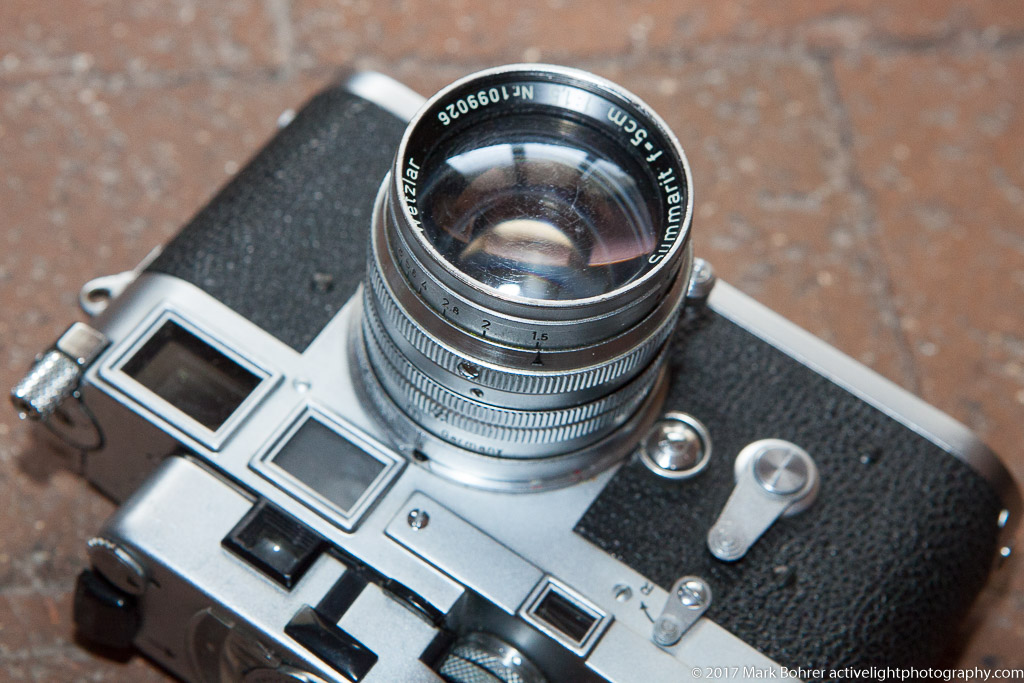 Leica M3 with Leicameter MR4 and 50mm f/1.5 Summarit A Leica M3 and One Lens – Mostly I used a Leica M3 and 50mm f/1.5 for just about everything in the late 1960s and early 70s. Occasionally I’d mount a 135mm f/4.5 on the camera, but the 50mm worked pretty well to document classroom life, Lake Michigan beaches, and the forest preserve down the street. I’d inherited the camera and lenses, bought by my grandfather in Germany in 1954. I didn’t use any other glass because I couldn’t afford it. Consequently, I missed a few shots where in-between focal lengths would have helped. Things would never be that simple again. A SLR and One Lens – Mostly I finally realized I couldn’t easily shoot everything I wanted with the Leica, and bought a Canon A-1 SLR and FD 35-105mm f/3.5 zoom. That zoom was one of the first with a constant maximum aperture – it gave you f/3.5 over its entire zoom range. It also tended to come apart right above the zoom ring. I must have had it repaired at least five times. Several years later, I found myself at an IEEE LAN standards conference in New Orleans without a camera. (I was helping to write the Ethernet networking standard at the time.) Primo place, had to shoot it. So I went to a camera store near the French Quarter and picked up a Canon new F1. I chose an FD 28mm f/2.8 lens to go with it. I figured it was a wide-enough view to capture classic Vieux Carre architecture, and do some people shots by zooming with my feet. I also thought it would be a nice complement to the 35-105mm zoom in the future. Back home I found myself needing a little more reach, so I got an FD 200mm f/2.8. This is the classic focal length for motor sports, and gives a bit of working room for anything you don’t want to get too close to. I also added a 17mm f/4 for those times when I wanted more in the picture. And that batch of lenses served me well for the next 16 years. Autofocus Digital Changes Everything In early 2003 I was suddenly without a job and a father, and freshly out of the hospital after a bicycle accident – all in the same six weeks. I was sick of the semiconductor industry after 25 years, so I decided to try shooting wildlife full-time. I’d partially switched over to autofocus digital Nikons a couple years ago after seeing them used at the Sea Otter Classic pro mountain bike races. And I knew my remaining manual-focus film cameras weren’t going to cut it. 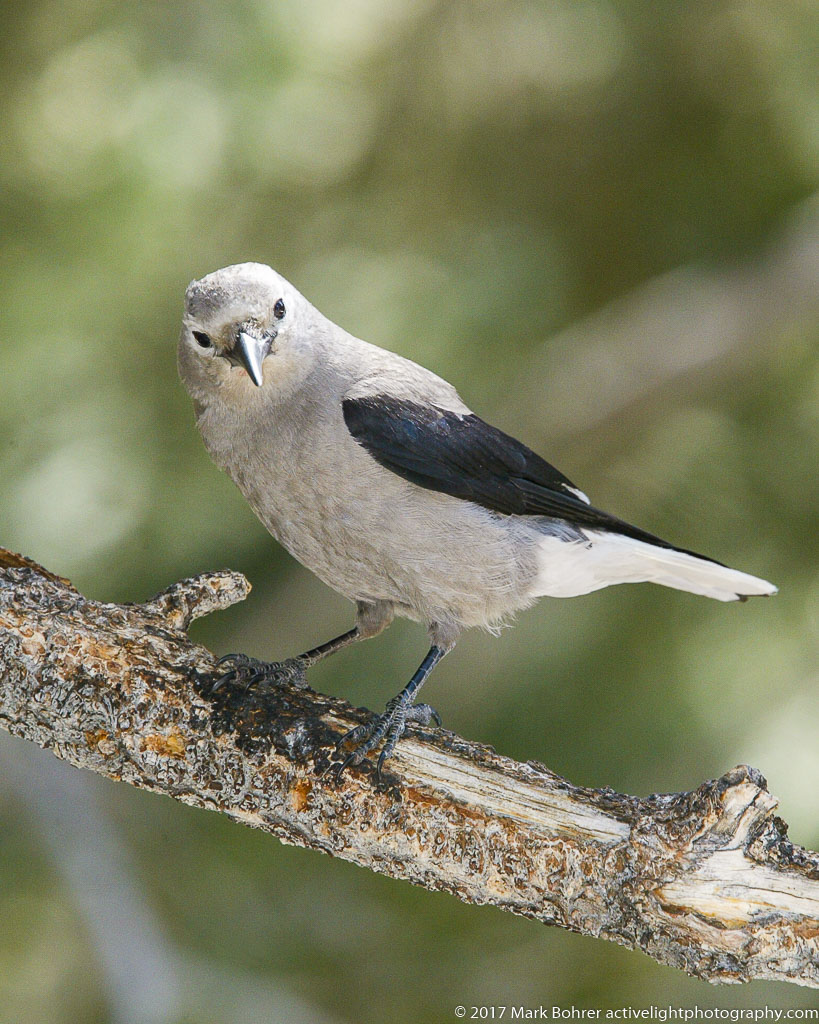 Clark’s Nutcracker, Moose Peterson’s front yard, Mammoth Lakes, California 400mm f/4 DO IS with EF 1.4X II on EOS 1D For wildlife, I needed something longer than 200mm. My first choice was a 400mm f/4 DO IS, light and image-stabilized, something Nikon couldn’t give me at the time. So I bought the 400mm, EF 1.4X II teleconverter, and Canon’s original 4MP EOS 1D dSLR. Even with the EOS 1D’s crop sensor and a teleconverter, pro wildlife shooter Moose Peterson convinced me the 400mm wasn’t quite long enough for Clark’s Nutcrackers and other perching birds at a photo marketing workshop. So I picked up a 500mm f/4L IS, and started shooting squirrels, herons and bison.  Belding’s ground squirrels, Mono Pass trail, Yosemite National Park These guys replaced the golden-mantled ground squirrels from a few years prior EOS 1D mk II, 500mm f/4L IS, EF 1.4X II teleconverter – slight crop 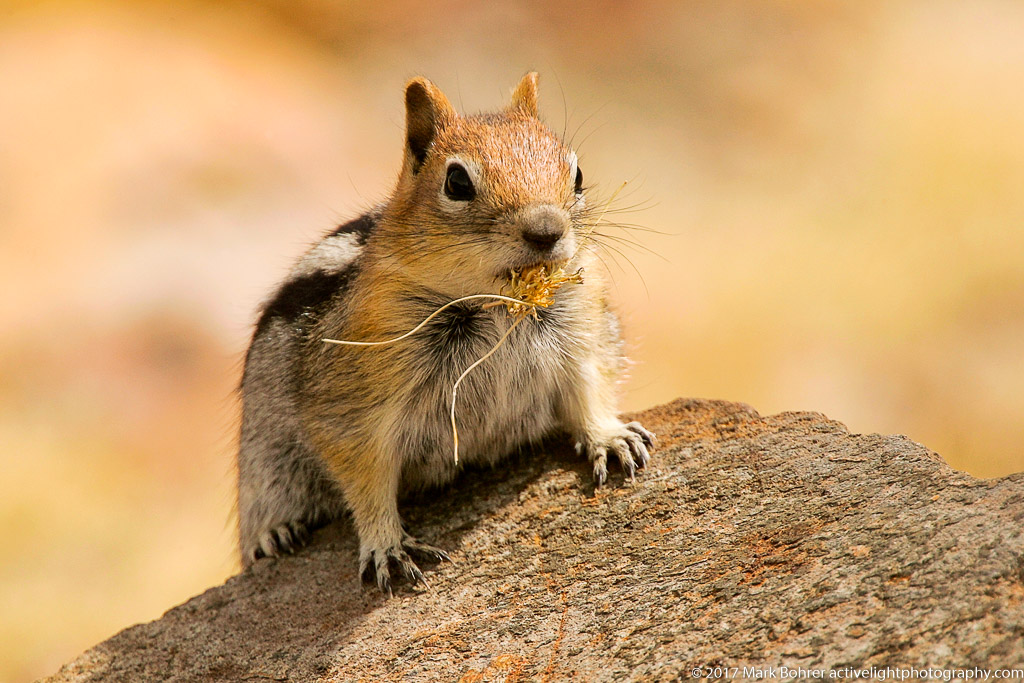 Golden-mantled ground squirrel, Mono Pass, Yosemite National Park EOS 1D mk II, 400mm f/4 DO IS, EF 2X II teleconverter I sold the last of my manual focus SLR gear and all my Nikon stuff shortly thereafter. (I kept the Leicas – I’m not crazy.) Since I could afford it, I bought Canon’s 16-35mm f/2.8L, 24-70mm f/2.8L, and 70-200mm f/2.8L IS for general coverage. 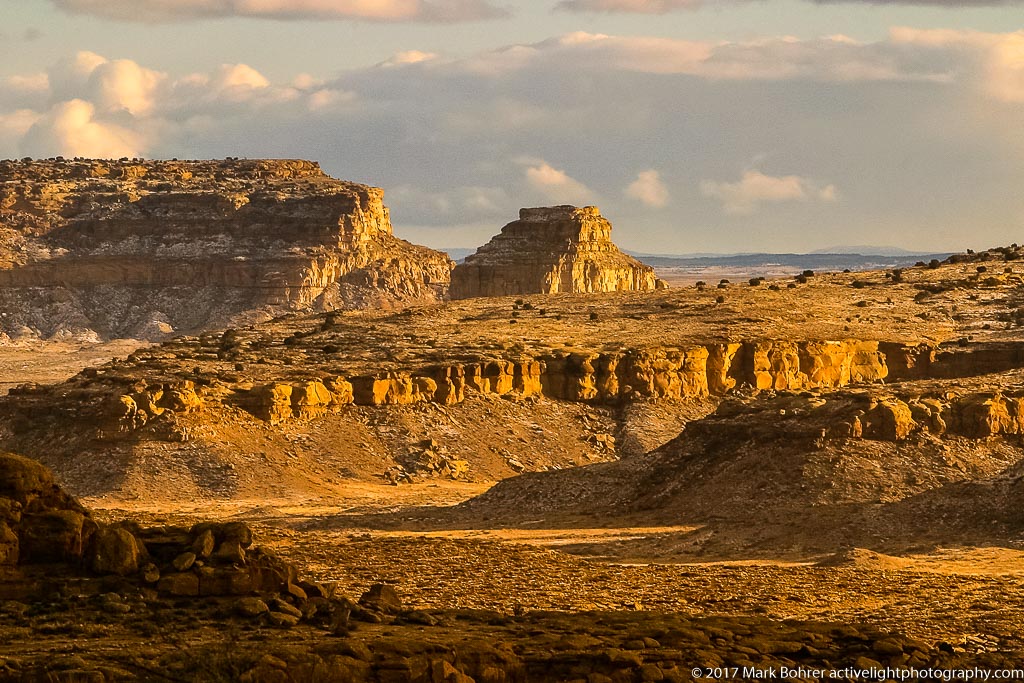 Fajada Butte from North Mesa, Chaco Canyon, New Mexico EOS 10D, 70-200mm f/2.8L IS at 200mm – slight crop 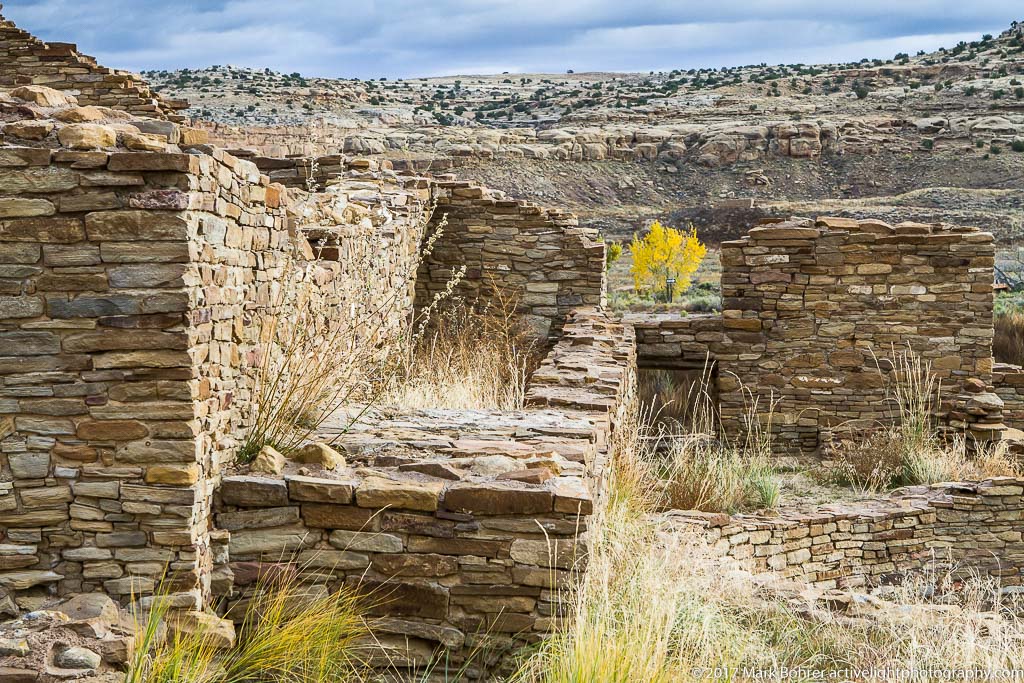 Pueblo Bonito in autumn – Chaco Canyon, NM EOS 7D, 24-70mm f/2.8L at 38mm It All Depends On What You’re Shooting For general travel, I’d bring the three zooms. But I usually left the 16-35mm in the car, since 24mm was wide enough 90% of the time. And I hated carrying the heavy 70-200mm f/2.8L IS. But I needed more reach than 70mm for shooting in places like Mono Lake or Chaco Canyon. So I clipped the encased 70-200mm to my waist with a holstered EOS 1D series dSLR and the 24-70mm, and sucked it up. 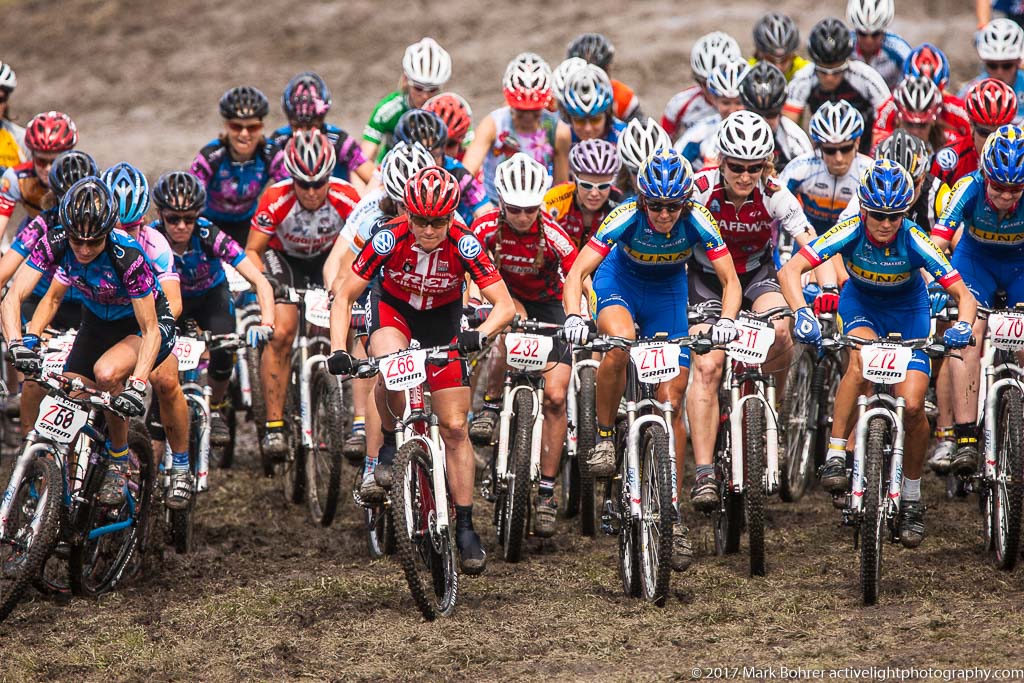 Womens’ pro Short Track Cross Country (STXC) mass start 2006 Sea Otter Classic EOS 1D mk II, 400mm f/4 DO IS 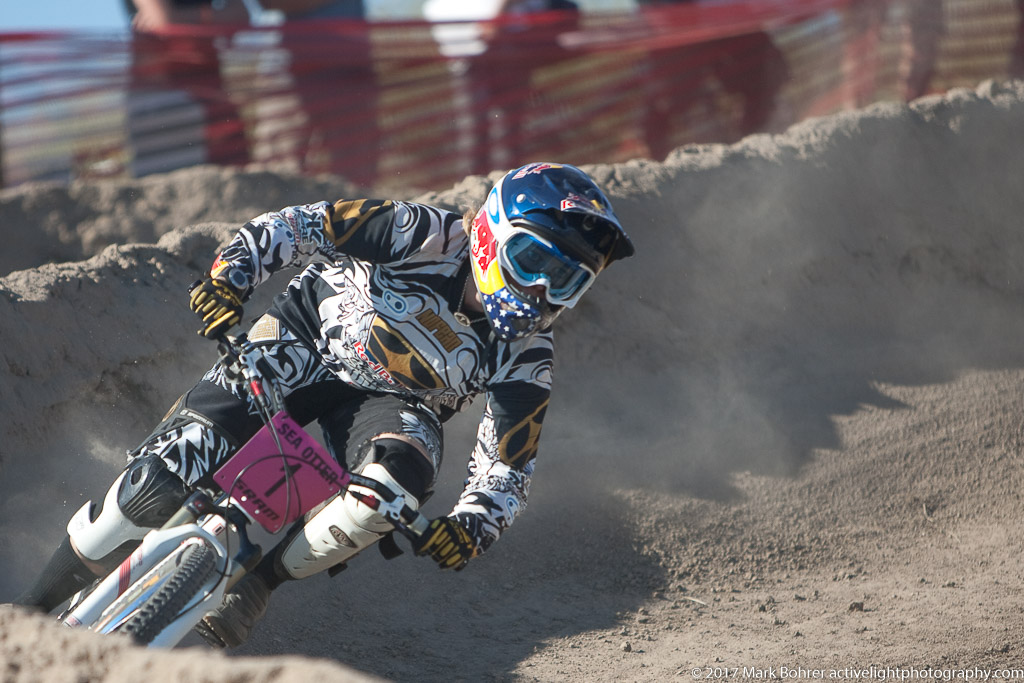 Top seed in womens’ pro dual slalom – 2009 Sea Otter Classic EOS 1D mk II, 70-200mm f/2.8L IS, slight crop At pro mountain bike races like the Sea Otter Classic, I’d fill a camera backpack with 24-70mm on one camera, 70-200mm on another, and flashes with big batteries for both. Sometimes I’d carry the 400mm for mass-start pictures in cross-country events. On the dual slalom course, I’d strap on the cameras with the zooms and mounted flashes, dump the backpack somewhere out of the way, and go. 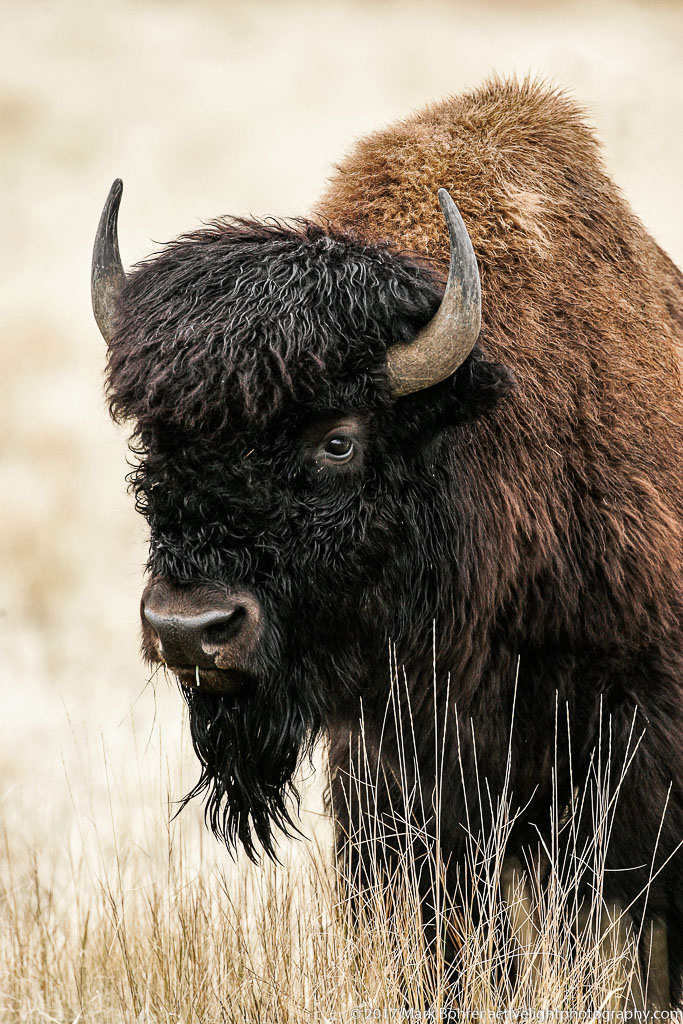 Bison portrait, Antelope Island, Great Salt Lake EOS 1D mk II, 500mm f/4L IS And wildlife – for best working distance, I’d bring the 500mm f/4L IS on a tripod. I had a dedicated long lens case for lens and camera, but I’d end up hand-carrying the required tripod for ground squirrels on Yosemite’s Mono Pass trail, or the namesake pronghorn on Great Salt Lake’s Antelope Island. I also learned to bring a second camera with a short lens for those inevitable shots of the ranger rescuing a fallen egret nestling or a coyote walking the trail 20 feet away. And all of it weighed a ton. 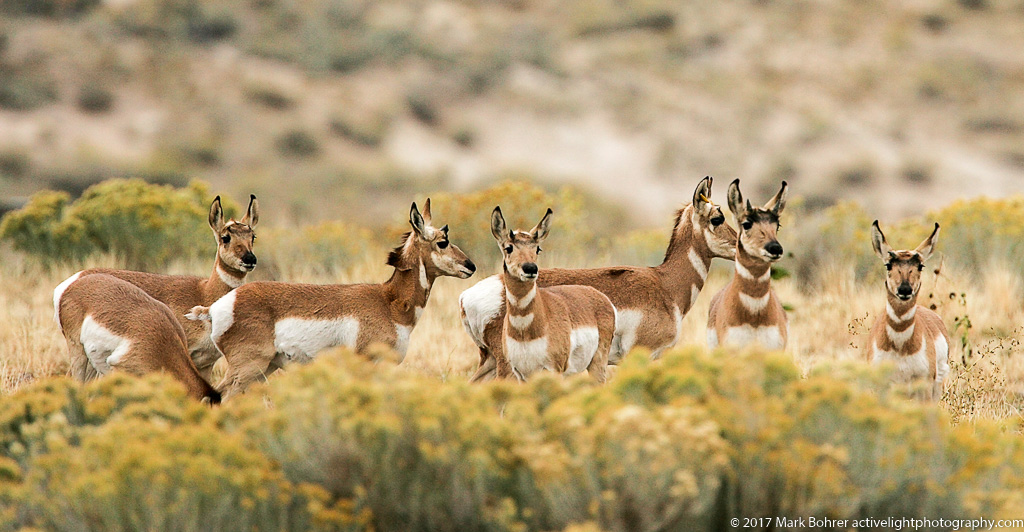 Pronghorn herd, Antelope Island, Great Salt Lake EOS 1D, 500mm f/4L IS, EF 1.4X II teleconverter – cropped upper I got some great pictures. But my back began to hurt. So I started looking for lighter-weight solutions. 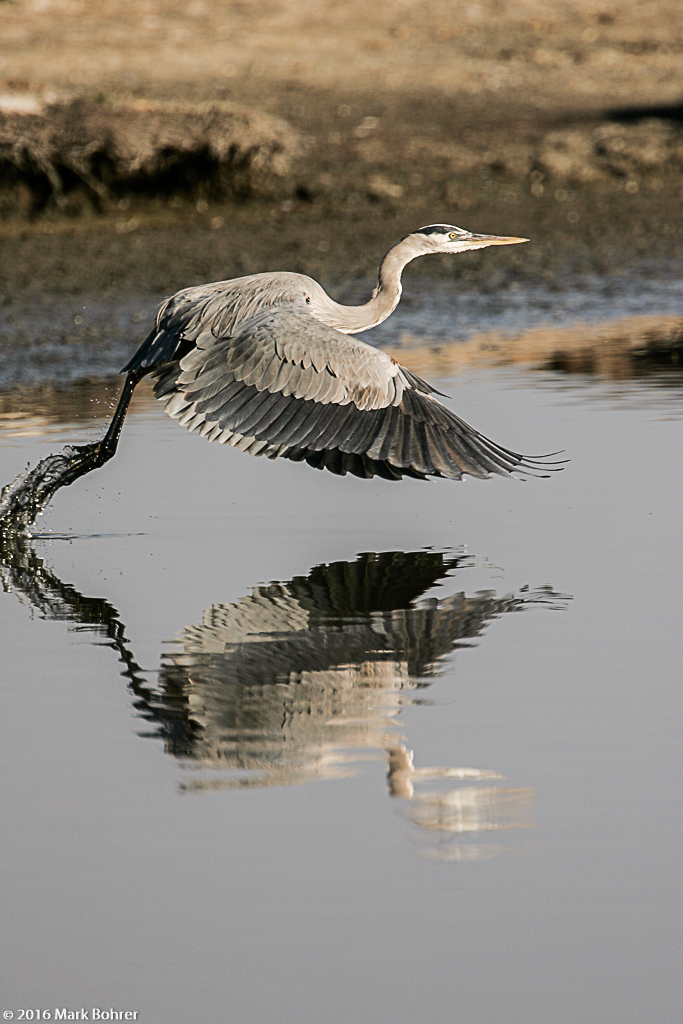 Great blue heron takeoff, Shoreline at Mountain View, California EOS 1D mk II, 500mm f/4L IS, EF 1.4X II teleconverter Avoid the Kitchen Sink 1 I’d been carrying EOS 1D-series and 10D-20D cameras with their optional battery packs, to get a second shutter button for verticals and extra long-lasting battery power. But those camera setups are really heavy. I began using barefoot dSLRs without the battery packs, and I retired the 1D mk II when the 5D mk II and 7D came out. 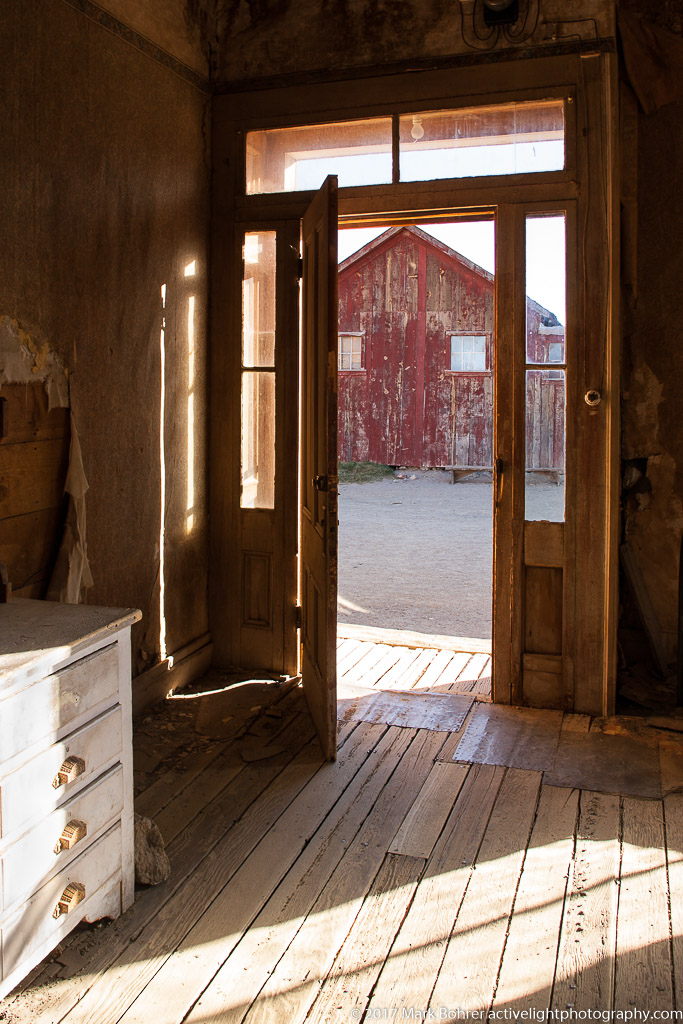 Bodie Ghost Town, California Inspired by Ace Powell’s oil painting “Ghost Town” EOS 1D mk II, 24mm f/3.5L TS-E I really didn’t need the extra power from a battery grip – the life of a single dSLR battery was more than adequate for at least a couple days’ shooting. And I didn’t need the built-like-a-tank 1D cameras. The 5D mk II was built well enough to shed water and mud in major storms, and it weighed a lot less. So I started carrying just the 5D mk II with the 24-70mm, with a mirrorless Fuji X-E2 mounting a manual focus FD 100-300mm f/5.6L. That lens was a $200 eBay special. 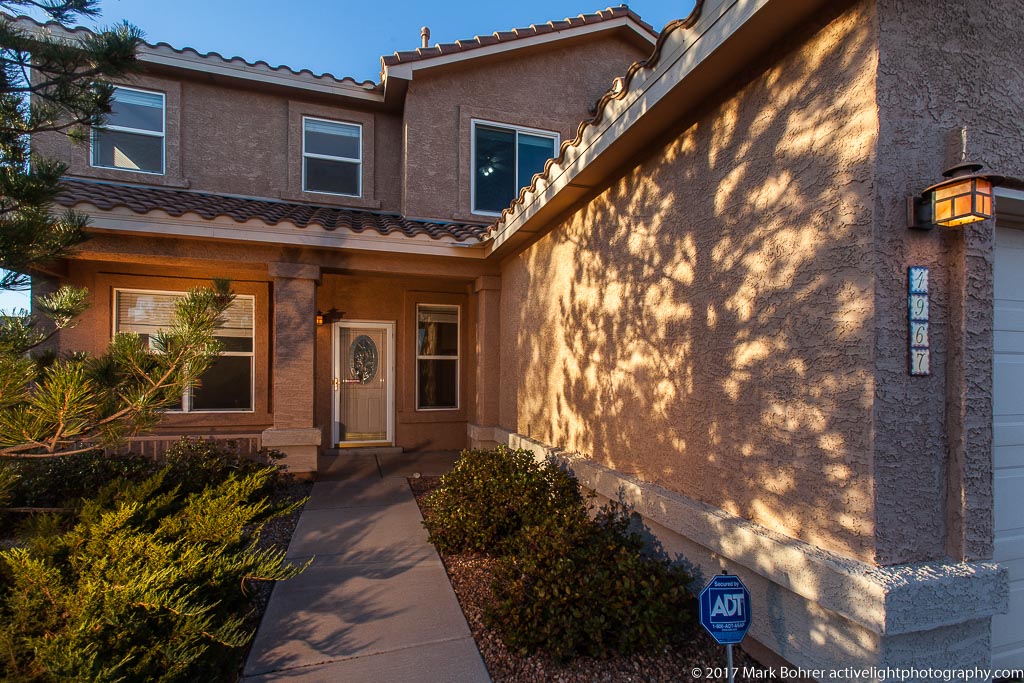 For Sale – Albuquerque, NM EOS 5D mk II, 16-35mm f/2.8L at 16mm, 3 430EX flashes – one on porch, one sidelighting and one frontlighting tree I still packed heavy gear, but only in situations like a real estate shoot where I needed special optics and wouldn’t have to carry them very far. For real estate interiors I can do that shoot in two lenses – a 24mm f/3.5L TS-E and the 16-35mm f/2.8L. But I need 2-3 flashes and light stands plus remote radio triggers, plus spare batteries for all the flashes and remote triggers. It still ads up.  A bug on the menu – Indigo Crow, Corrales, NM Leica M10, 28mm f/2.8 Elmarit-M ASPH II Avoid the Kitchen Sink 2 Now I’ve sorta gone full-circle. For travel I’m carrying a Leica M10 with 16-18-21mm f/4 ASPH, 28mm f/2.8 ASPH, 35mm f/2 ASPH, and 50mm f/1.4. Oh, and the Fuji X-E2 with the 100-300mm. And maybe an EOS 7D with the 400mm f/4 DO IS in case there’s wildlife. Still seems like a lot, right? 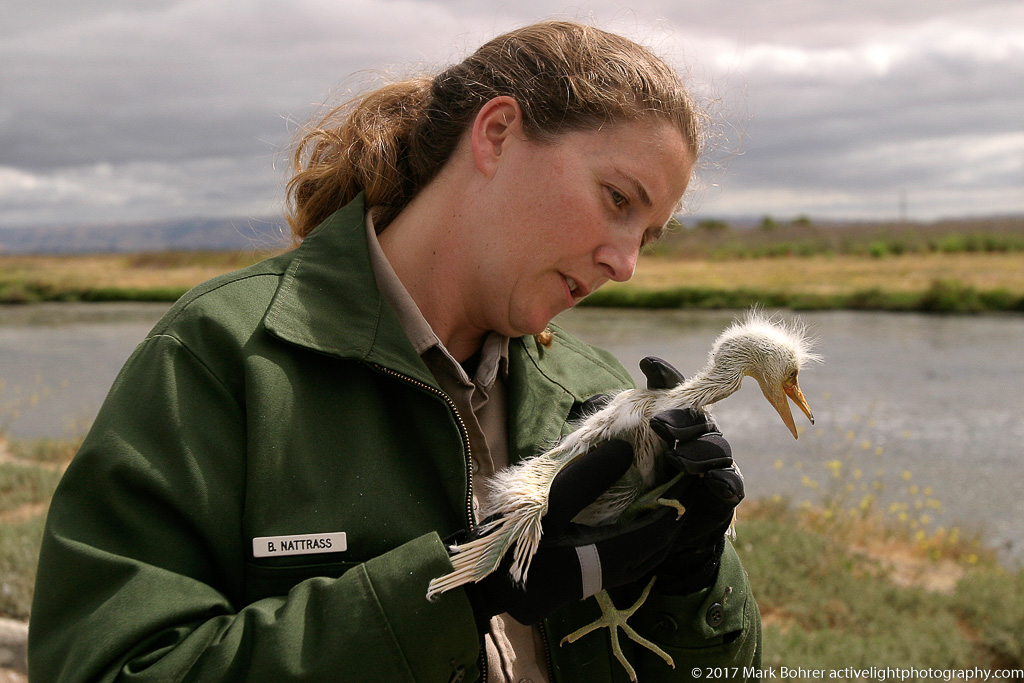 Ranger Bonnie Nattrass and rescued egret nestling Palo Alto Baylands, California EOS 10D, 16-35mm f/2.8L at 35mm So I’ve been looking at the focal lengths I use for most of my pictures. Usually no wider than 24mm, some at 35mm, 50mm, and 70mm. Many of the 24mm pictures could probably have been shot with a 28mm backed up a few paces, or excluding some stuff that didn’t directly support the picture. That’s always the catch with wide-angle lenses – you need to fill the frame, but with important detail that supports your story. Avoiding a crop speeds up my workflow when I get home. I try to crop in the camera, to the cool thing that stopped me in the first place. I like isolating a subject with depth of field – blurring the background to make a foreground subject really pop out. Doing that with an f/2.8 wide requires close distances, and careful subject placement to avoid stretched features. I usually like f/2 or f/1.4 apertures for tight depth of field. That’s why I’ve been carrying the 35mm f/2 ASPH and 50mm f/1.4. But with the 75mm f/2, I can leave the 50mm at home. And I’ve discovered the nice blur with the 28mm f/2.8 wide-open and close. Where does that leave me? And The Answer Is… I’m going to try a 28mm, 75mm and 135mm with one M10 camera for my next trip. For portable reach I’ll have the X-E2 with the 100-300mm f/5.6L. I’ll also be packing the RV with the 500mm f/4L IS and EF 1.4X II for August’s total solar eclipse. And I’ll have the required filters and other gear to shoot this once-in-a-decade event. But most of the time, I’ll be carrying around the M10, X-E2, and their lenses. That’s it. And my body will be thanking me all the way. Shot Notes Commercial shooter Kirk Tuck once told me, “You can shoot saleable stuff with film and a $99 Yashica MAT-124.” He’s right – mostly. For 90% of what I shoot, I could be using cheaper consumer zooms. So why don’t I use consumer zooms? The three main reasons for lens choices are it doesn’t break easily, you’re used to it, and you like the way it draws. I’ve been using Leica lenses since 1969, when they were better optically amd mechanically than anything else available. I’m used to their lightweight small size and manual operation. I also love the way the recent (and not so recent) designs ‘draw’ a picture. The newer ASPH designs are very sharp to the corners at maximum aperture – that means great contrast in both coarse and fine detail. Lines and curves stand out strongly across the picture. Even the older 1960s designs are better than a lot of today’s zooms. Way More Sturdy Canon’s pro-level L-series optics are way more sturdy than Canon’s other lenses. I’ve broken three 77mm UV filters on the front of the 70-200mm f/2.8L IS in dirt and mud. The lens itself hasn’t ever needed repair. I had an EF 24-85mm f/3.5-4.5 lens for awhile as a lightweight alternative to the 24-70mm f/2.8L. After its third repair, I sold the 24-85mm. It just wasn’t built well enough. Keep Straight Lines Straight If you’re worried about straight lines staying straight in real estate, ghost towns and ruins, you’ll save yourself a lot of grief with a low-distortion extreme wide-angle. Canon’s EF 16-35mm f/2.8L gives you wavy mustache distortion at the picture’s edges. This is very difficult and time-consuming to correct in Lightroom. Reviewers say the most recent version III corrects this. I didn’t want to find out, so I opted for Leica’s Tri-Elmar 16-18-21mm f/4 ASPH, actually a well-corrected 16-21mm zoom. It’s much lighter and smaller than the 16-35mm f/2.8L, and has minimal distortion – the little remaining is the easily-correctable barrel variety if a client’s really picky. And I could afford it. Tilt-Shift for Architecture Just one more thing – if you shoot architecture and want to reduce your time in post, get a TS-E lens or the Nikon equivalents. These guys let you shift the optics to capture tall subjects without leaning distortion from a tilted camera, just like a view camera’s lens shifts. My 24mm f/3.5L TS-E on a full-frame camera is just about right for exterior views. Used first-version 24mm f/3.5L TS-E lenses are relatively cheap – often below $800 – since the second version appeared. You need to remember to manually focus – no AF here – and stop down to at least f/11 for best sharpness across the frame. Because of the way Canon EOS dSLRs meter things, you’ll need to set the exposure manually before you tilt or shift. |
(408) 483-3782
Curious about how to shoot ruins?(408) 483-3782
Recent Comments