|
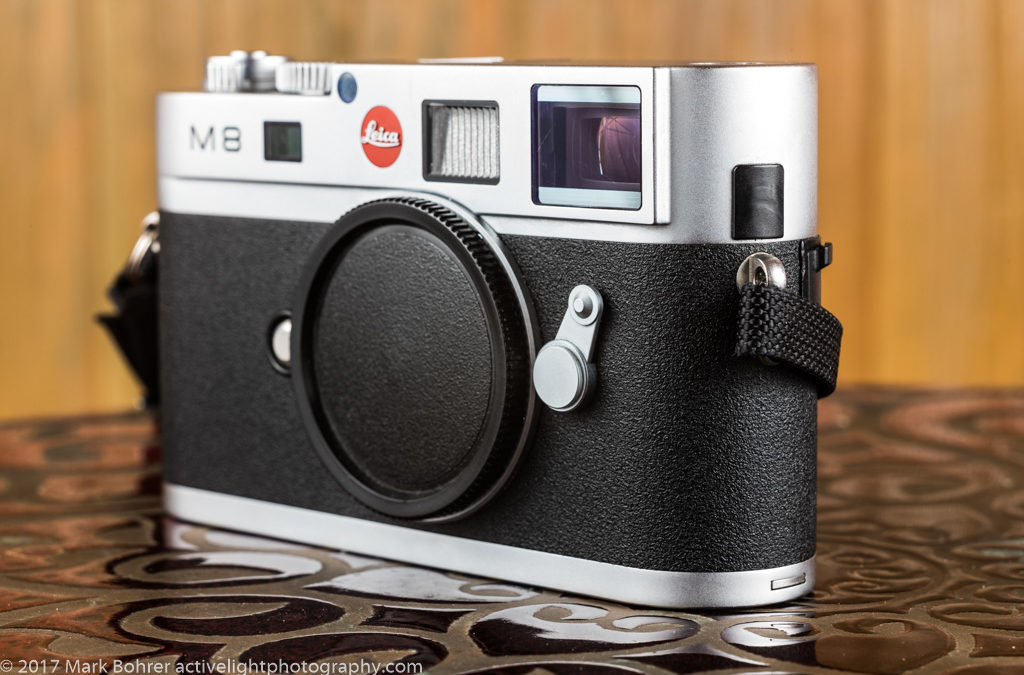
There are two types of subjects, those that talk back and those that don’t. While the talkers can be important family or event invitees, mute subjects may figure more prominently. Most of you have used eBay at one time or another. When you’re buying by remote control, seeing the merchandise becomes intensely critical. I’m no catalog photographer, but when I’m selling gear online, I need to illustrate it well. And that usually means flash.  Angled side view, Leica M10 by flash light Shoot to Sell It Most folks are thinking about Christmas shopping right now. That makes it an outstanding time to sell stuff you no longer use to someone who can. eBay sales give you extra money for shopping, or the cash to buy something for yourself that you actually want. Then you won’t mind the usual socks or scarves or neckties so much. 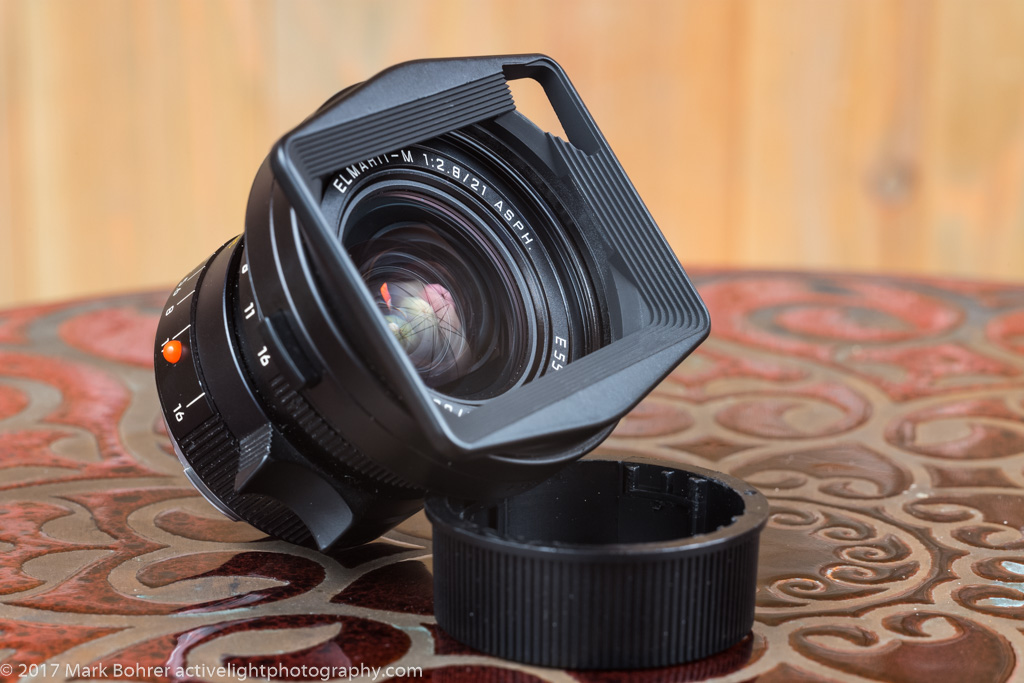 Lens for sale – 21mm f/2.8 Elmarit-M ASPH You could just take your gear out and shoot it any old way. But it’s like real estate – everyone wants the cleanest, best-looking house. To get top dollar, I clean up used gear, verify it’s working (important), and light it simply to photograph well. In our visual society, pictures sell best.  Leica M8 top view Get Control! I used three flashes here, but could have lit with one and some window light. Either way, flash gives me control. I can create the best light for the thing I’m selling.  3-flash setup with umbrellas and a cap For best-looking pictures, I get flashes off the camera. Flash mounted on the camera’s hot shoe gives you harsh shadows in mug-shot style – not attractive. I have inexpensive and light Manfrotto lightstands to do this. Mine are old, but similar new ones run about $50. To trigger ’em without wires, I use RadioPopper Jr2 remotes. These let me dial in flash power from the camera, a real time-saver with multiple-flash setups. But with fewer flash units to walk around and adjust, you could use RadioPopper’s Nano triggers, or really low-cost Yongnuo triggers. I’ve used Yongnuo’s YN-E3-RT to trigger Canon 430EX III-RT flashes, and it works well. But I’d check online reviews of any Yongnuo triggers and their reliability before you buy. 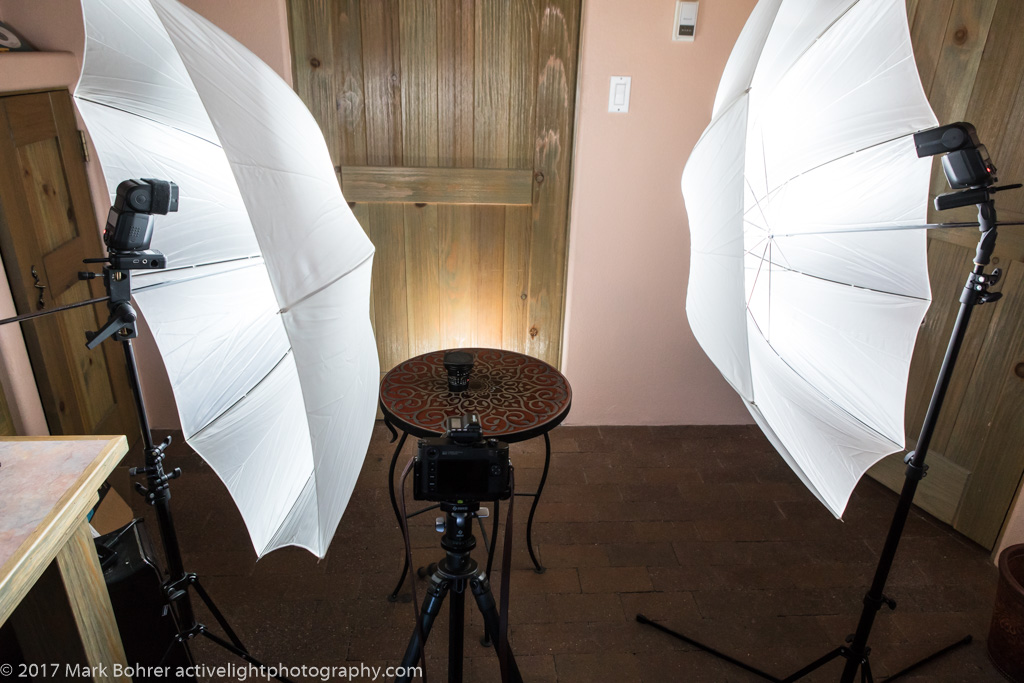 Behind-the-camera view The Setup To illustrate small camera bodies and lenses, I used a fairly simple three-light setup. My strong main light was really close to the gear on camera left, my same-strength fill light was about twice as far away on camera right (giving maybe 1/4 the power at that distance – more about this inverse square law thing later), and a shadow-killer light blasted the background at much lower power. The main and fill popped through umbrella diffusers, which turn a small, intense flash into a nearly 4-foot diameter soft light source. The shadow-killer wore a diffuser cap for wider coverage and a little softening. It may seem counter-intuitive, but when you have a large light source close to your subject, the light tends to wrap around it and soften shadows. The sun is a strong light source, but it’s a tiny point over 92 million miles away. So it creates very harsh shadows, especially in summer at mid-day. Using a large light source in close also works well with portraits or family pictures. That’s why you see big softboxes closeup at many commercial studios. Exposure Numbers – Power and Distance An EV is an exposure value, with every full-unit EV change representing a factor of 2 difference. The Jr2 remotes let you adjust your lights’ EV strength from 9 down to 0. That’s a 2 to the 9th power range, a factor of 512 from brightest to dimmest. And the Jr2 lets you do this in 1/3 EV steps for very fine control. An EV value of 8 is two to the first power or twice as strong as 7 (8-7=1). And EV 8 is two to the fourth power or 16 times as strong as EV 4 (8-4=4). For the mathematically-inclined, the EV value is an exponent. The other variable in light power is the subject’s distance away from the light source. Simplifying it a ton, the light on the subject is proportional to the inverse square of its distance away from the source, or 1 / (distance)**2. Two lights may have the same output power, but if one is twice as far away as the other, it only puts 1/4 of the closer source’s light on the subject. Flash Triggers and Manual Shooting I shot most of these with the Jr2 transmitter telling the flash to use 8.3 EV main (from left), 8.3 EV fill (from right, but twice the distance away), and 4.3 EV shadow-killer background. I set ISO 400, and f/11 on a 75mm lens. Sometimes I shot at ISO 800 and f/16 for maximum depth of field (wide range of sharp focus), and set flash power to (8.7, 8.7, 4.7) for (main, fill, shadow-killer) – a slightly darker overall exposure. The RadioPopper makes this easy – you select all flashes for power change, turn the thumbwheel, and they all move together in the same ratio. Your flashes’ relative powers don’t change, only the overall light intensity. This is much easier than visiting each light on its stand and adjusting individually. 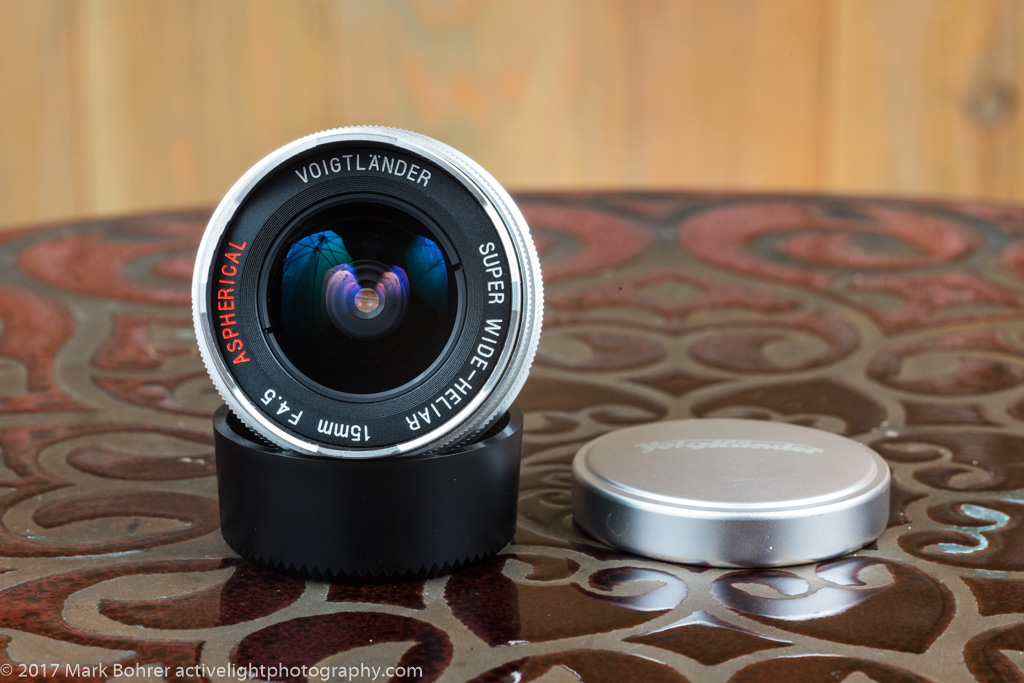 Voigtlander 15mm f/4.5 Super-Wide Heliar Umbrellas reflected in the lens’ front glass Since I used mirrorless equipment in manual-everything mode, I set the lens to its maximum aperture to compose and focus, then stopped back down for the pictures. A camera on a tripod makes this consistent and easy, but you can shoot without one. High-enough ISO and a steady hand will give you sharp pictures. And autofocus lenses let you simply compose and shoot at the aperture you need for depth of field. Flash Sync and the High-Speed Slit For simple flash shots, your camera restricts you to a maximum shutter speed, usually 1/180, 1/200 or 1/250 second. Why is this? Most mirrorless and dSLR cameras still use focal plane shutters. There are two shutter curtains, one that pulls back on one side to expose the sensor (or film), and a second that pushes across from the other side to end the exposure. The trouble is that each curtain takes some time to move. For faster speeds (above that 1/180 or 1/250 second), the exposed area becomes a slit that moves across the sensor. Flash duration is short enough that you’d only light one part of that slit. So the sensor needs to be fully-exposed to see the flash over its entire surface. That happens at or below the 1/180 or 1/250 second flash sync speed, when the sensor shows its entire face to the lens at once. A One-Flash Alternative I could also have used window light as my fill, with one flash as a main light and a reflector to shine on the background and kill the shadows. Window light is indirect (especially with windows NOT facing south), so it can have the effect of a window-sized light source. A push-on diffuser on a flash spreads its light a little bit if you lack a photo umbrella, and a big piece of white paper or white cardboard can be used to reflect some of the light onto the back wall. Or if your room is big enough, you can move the subject forward five feet or so from the back wall to keep background shadows out of the shot. Shot Notes Any picture’s composition depends on your light. For merchandise shots, I don’t want any directional light to be super-strong, and I want the whole thing lit. So I use light from two directions to light the front. I don’t like distracting background shadows, so I aim one shadow-killer light back there if I’m close to it. I’m not going to get fancy with rim back-lights for merchandise, but I might for a portrait. This separates a human subject from the background better. I might also add a hair light for some subjects (women usually, men not so much). 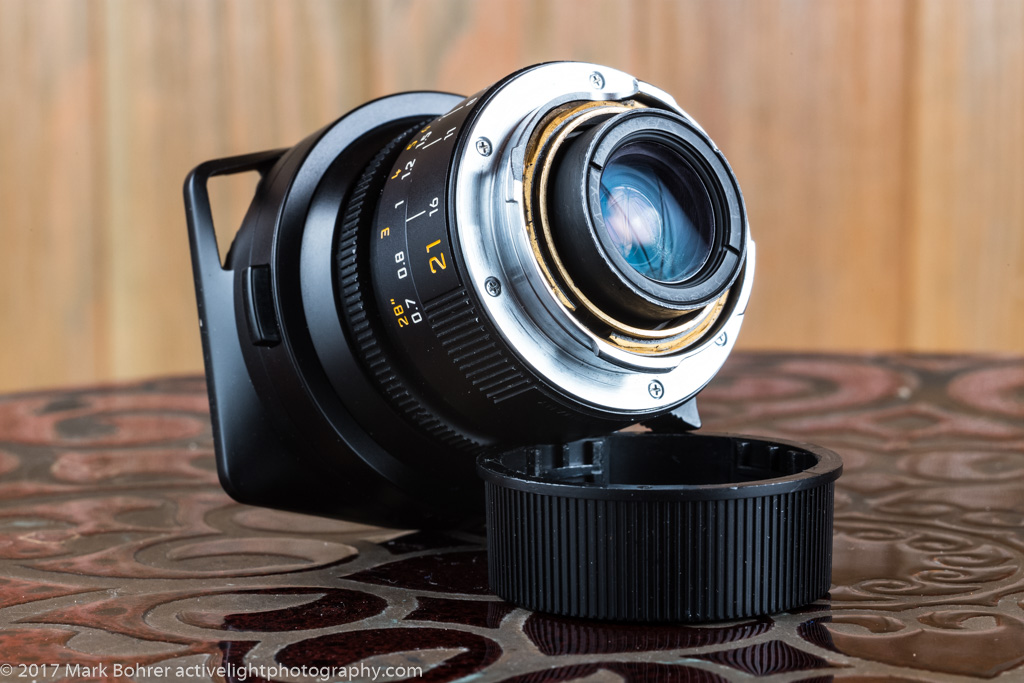 28mm f/2.8 Elmarit-M ASPH lens, back view Show Every View With merchandise, I want prospective buyers to see all parts of the gear that might be important to them. In addition, full views show them the overall condition. I’ll shoot every important view – usually six pictures for boxy subjects. If there’s a super-important detail they need to see, I’ll do closeups of that. Once I have the light setup, it’s easy to move the gear around in it for different shots. 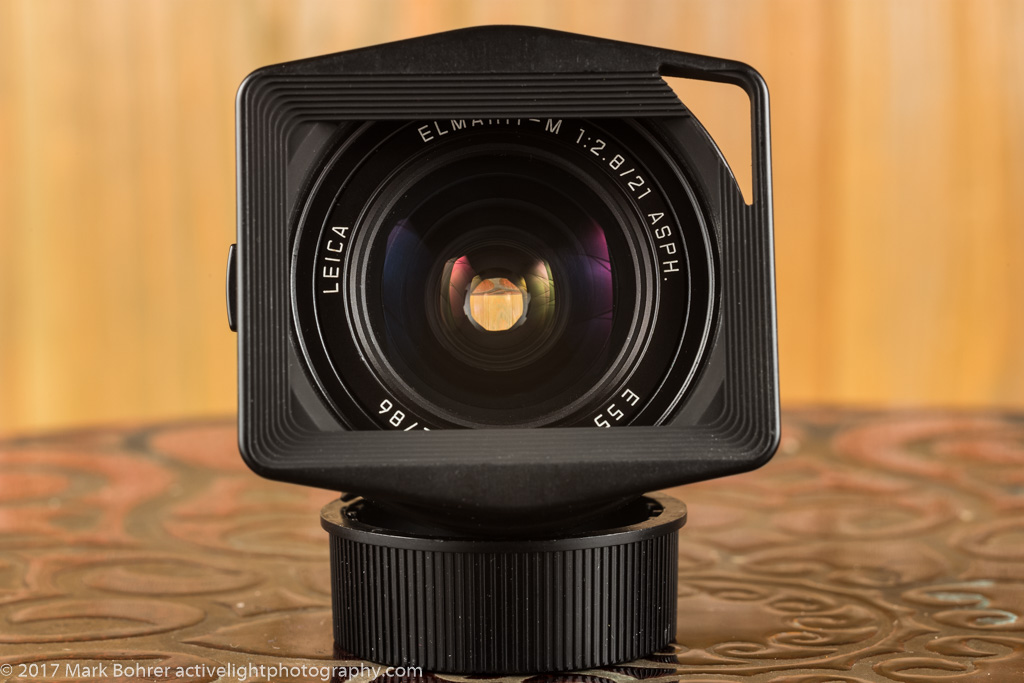 Front glass view – 21mm f/2.8 Elmarit-M ASPH Independent control of flash and natural light I also used manual exposure for total light control, as you’ll soon see. For a close-in shot near the 75mm lens’ 28″ minimum focus, I needed as much depth of field as I could get. So I chose f/11 or f/16. Then I set ISO and shutter speed to underexpose the natural light, making the shot dependent on the flashes. This usually happens when you use a shutter speed near the maximum 1/160 or 1/250 flash sync speed. Combined with the small aperture, flash dominates when you set its power for a “correct” exposure that at the same time underexposes the natural light. You can add the natural light back in by slowing down the shutter speed. This has no effect on the flash, so you have independent control. My own “Ah-HAH!” on this stuff came many years ago when I realized flash exposure depends only on its own power during its short duration, 1/1000 second or less. Adjustable flash power and shutter speed give me independent control of the natural light to flash light ratio in most indoor situations. Add in aperture / depth of field and you control all the marbles. So you can overpower the sun’s natural light if you want to. Cool, huh? |
Shoot the Merchandise!
Recent Comments