
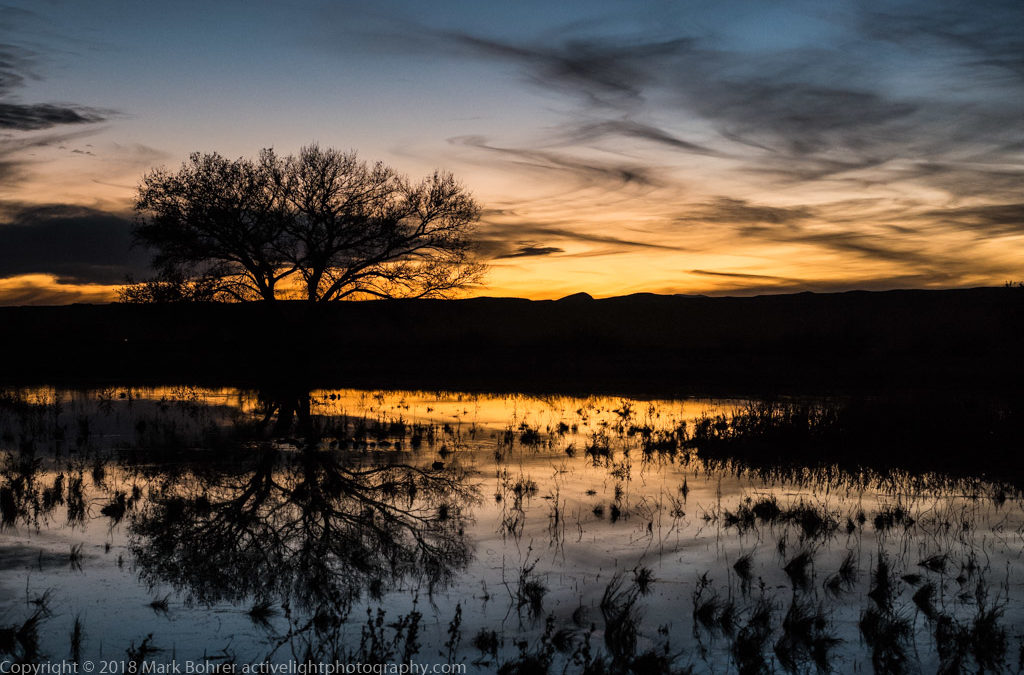
I admit it – I’m a Leica user. Yes, it can be an expensive addiction, but you’re buying something much more durable than a simple buzzed high. And potentially much more satisfying.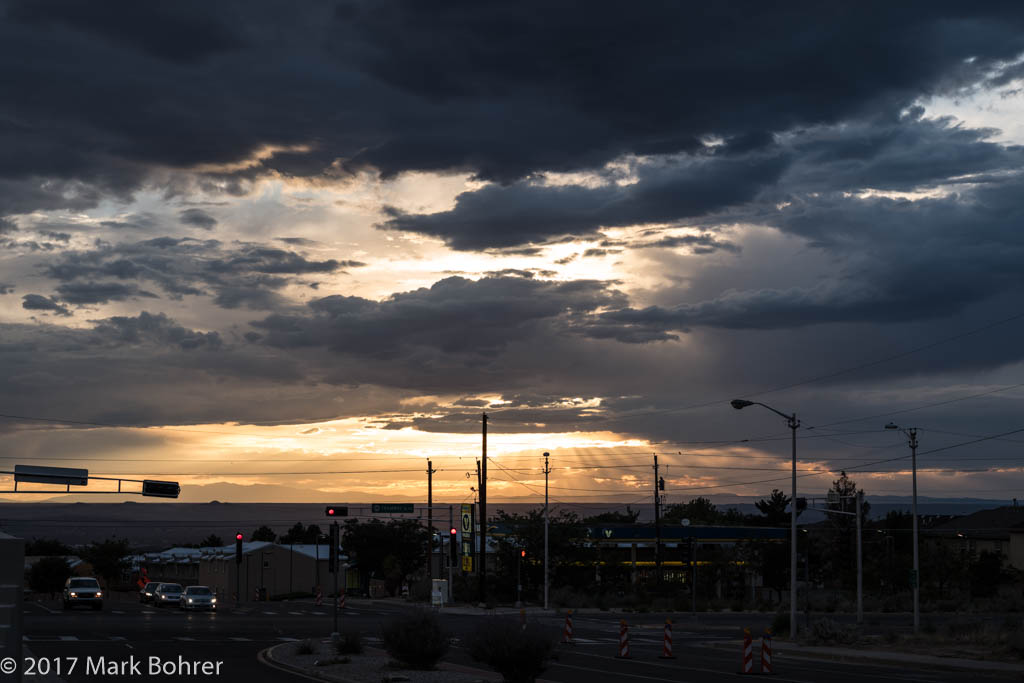 In Albuquerque’s Heights Leica M10 with 75mm f/2 APO-Summicron-M ASPH Last-Forever Ruggedness Leica hardware has a well-deserved reputation for rugged build quality. I have my grandfather’s 50mm f/1.5 Summarit from 1954. The only signs of use are scratches in the soft front lens coating from my teen-aged self’s over-zealous cleaning, and slight wear of the metal’s chrome finish down to brass around the infinity catch (a quaint anachronism to make the lens easier to twist on and off the camera). Yes, that lens gives images that are a bit soft compared to Leica’s recent intensely-sharp optics, but it’s still quite usable on any Leica M-camera made since 1954. Heck, it still works fine on my grandfather’s 1954 Leica M3. 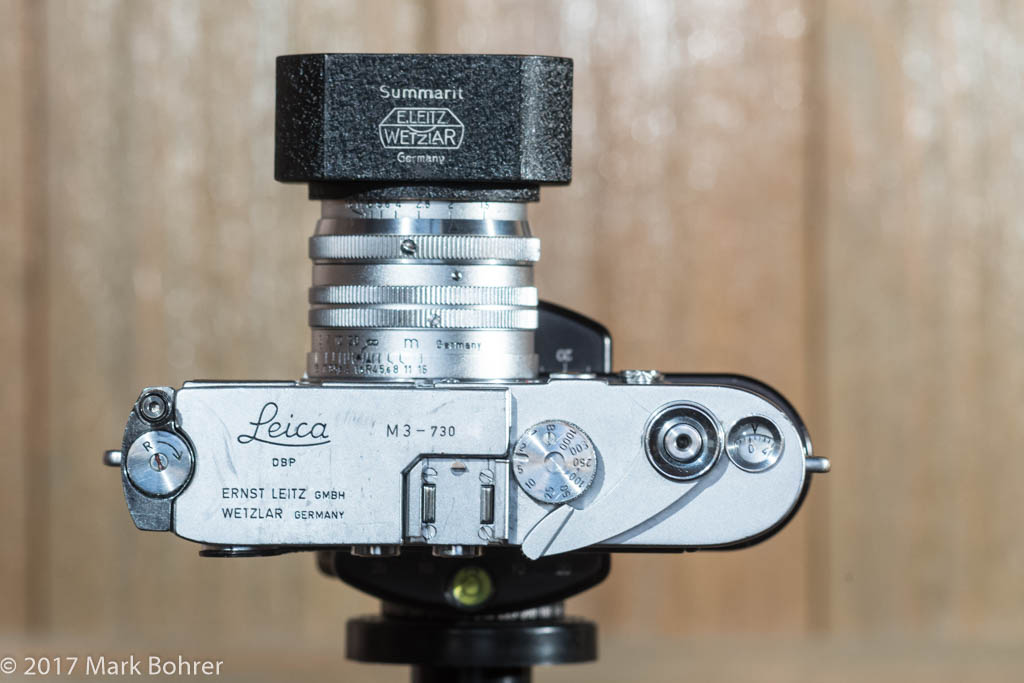 1954 Leica M3 with 50mm f/1.5 Summarit Yes, the M3 is a film camera, but you can find them on eBay for less than $1000 if you look. They’re built like tanks, and should still be functioning well enough to give to your grandkids. Parts continue to be made for them, so you can still get them fixed and adjusted when they need it. I could wax poetic about the look and feel of a Leica M-camera. Instead, consider a camera whose logical ease of use was developed over 90 years, and refined for the last 60 of those. Leica’s Oskar Barnack suffered from asthma, so he invented 35mm photography in the 1920s to give himself a lightweight camera that wouldn’t tire him too much. Leica merged separate rangefinder and viewfinder into a single window in that magic year of 1954, when the first M-series camera appeared. Everyone from Alfred Eisenstaedt to Robert Capa to Henri Cartier-Bresson to David Douglas Duncan to Pete Souza has used a Leica M to record the famous and infamous on city streets, battlefields, and in the White House. Bargain-Basement Pricing for Quality You’ll find Leica Lenses dating back to the 1930s on eBay, still quite usable and at very low prices. Lenses made before – you guessed it – 1954 require a screw thread to bayonet mount adapter, but will then work on post-1954 Leica M-cameras.  Leica 135mm f/4 Elmar on Fuji X-E2 Engraved depth of field scale is on lower lens barrel chrome I picked up a 1962-ish 135mm f/4 Elmar for $200 a couple years ago. That lens gives sharp, contrasty results in almost any shooting situation. 135mm works great for sports as long as you pick your position and pre-focus. It’s also great for discreet street shooting or any activity where you don’t want to get too close. Hands-On Photography Aside from indestructible equipment, you also get a return on your money in the pictures. A manually-focused (and manual-exposure) rangefinder camera requires your thought and input for every shot – what should be sharp? And what mood should your exposure show?  Looking through the M10 viewfinder: 90mm frame with out-of-focus twin image at center, auto shutter speed in red Distortion from iPhone 6 camera – frame lines are actually straight. The outer frame is for 28mm lenses – they come up in pairs for the matching lenses. Rangefinder focusing is easy. Simply turn the lens’ focusing ring until the twin images match in the viewfinder’s center patch. That patch is small enough to let you pick the prominent storytelling feature for sharpest focus, yet still big enough to see well. You can’t check the effect in the viewfinder, but any Leica lens’ engraved depth of field scale shows what range will be in focus for any aperture and distance. After awhile, you learn what you’ll get with your favorite lenses. You’ll start pre-visualizing the story before you look through a viewfinder. So you picked a large aperture for narrow focus on one subject, or maybe a small one to give a broad focus range for a large landscape. The M7 and later Leicas then give you the option of letting the camera choose the shutter speed. 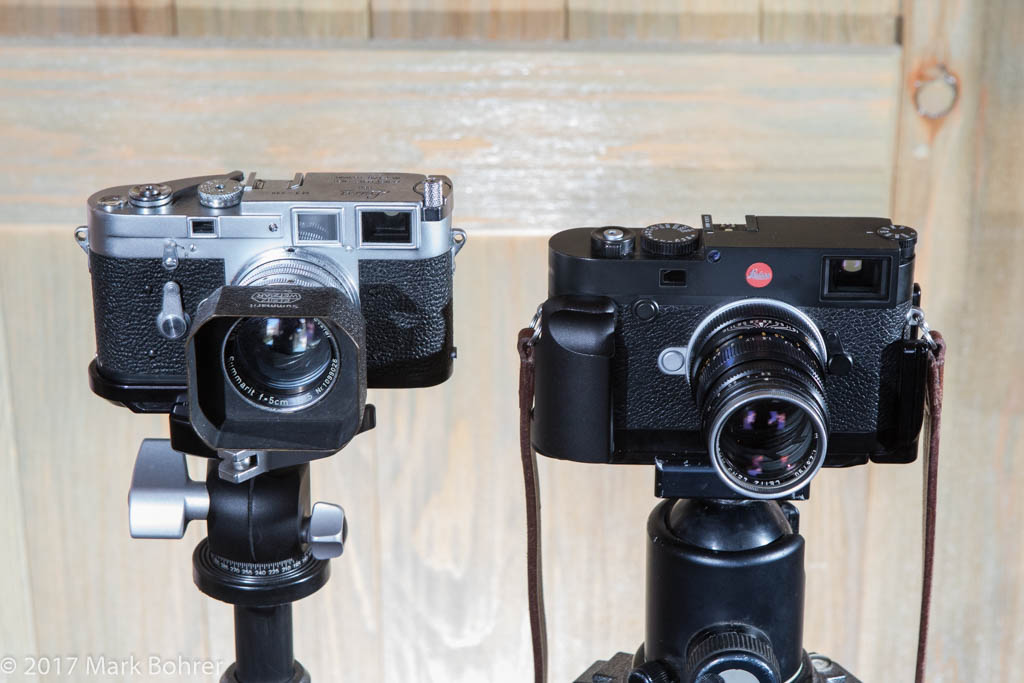 Meet the family – Completely manual M3 (L) with selectively-automated M10 (R) The M10’s RRS grip / plate is an add-on Pick a Speed… Otherwise, you use the camera’s built-in or clip-on exposure meter to help you choose that speed. With digital, I pick the ISO for the shutter speed I want, whether I’m freezing action (fast) or blurring a quickly-moving subject (slow). And the latest digital Leicas can be set to automatically pick the ISO per criteria you set. Force the camera to pick an ISO giving a slowest shutter speed of 1/focal length, a common rule of thumb for what you can handhold without blurring. You can also force higher or lower slowest speeds, as well as the highest maximum shutter speed and max ISO the camera will give you. So even here, you’re still involved in how you capture the picture. 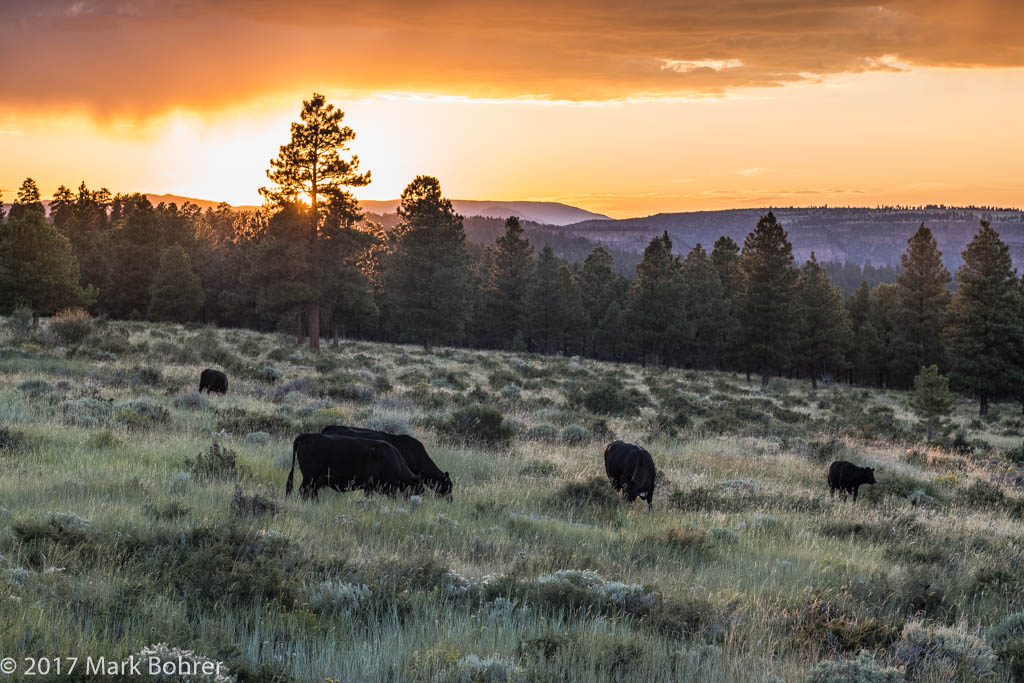 Bovine Sunset bordering Flaming Gorge National Recreation Area Leica M10 with 75mm f/2 APO-Summicron-M ASPH Compose and Shoot Then comes the fun part – compose and shoot. There’s some cool thing that made you hold everything and swing the camera up to your eye, usually the thing you’ll build the picture around. After setting up initial exposure, double-check focus (easy – it’s unfocused when you see a double image), place features in the scene (shot design), and shoot. Chimp if you must to check your digital picture, or just shoot some more and wait until the film comes back from the processor. That’s what I did for years with the M3.  Taos Plaza Leica M8 with Zeiss 25mm f/2.8 Biogon T* ZM After shooting enough pictures, you’ll start to notice things you prefer in your visual stories – dark, moody exposures, everything broadly sharp from small apertures, just your subject sharp with large apertures, action stopped with high 1/4000 second speeds, action blurred with slow speeds to show movement against a motionless background. You may also prefer to concentrate attention on lines and textures with black and white. Your gut will tell you when everything comes together. That’s the real reward – pleasure from getting it right and telling your story. And that’s one of the best highs there is. 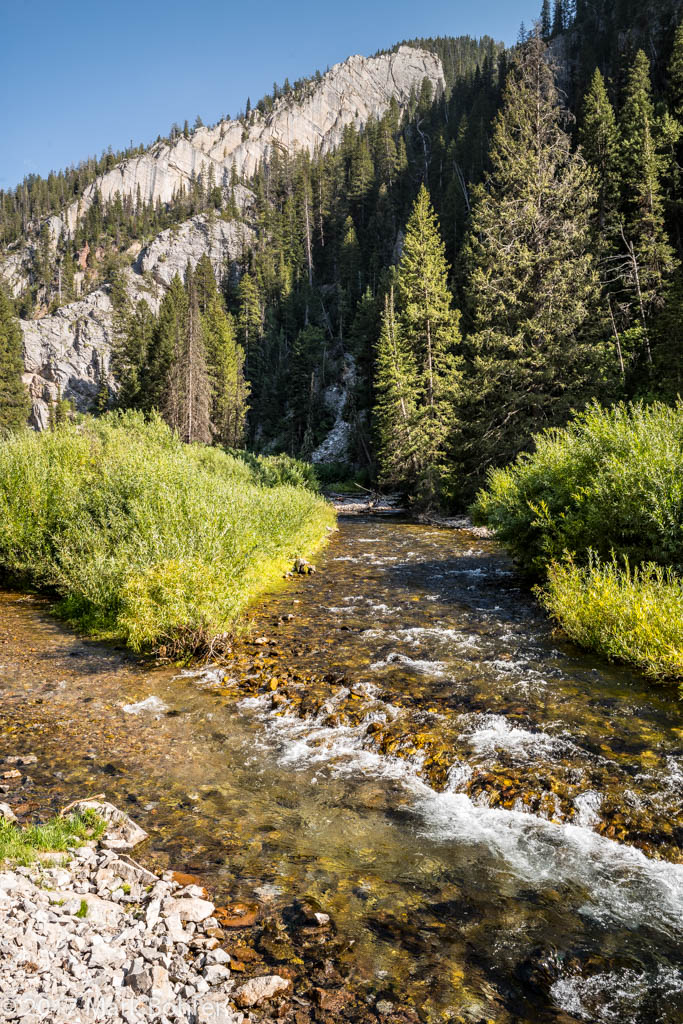 Salt River near Periodic Spring, Wyoming Leica M10 with 28mm f/2.8 Elmarit-M ASPH Shot Notes – Corner Color Shifts You don’t need a Leica M camera to use Leica lenses. In this age of mirrorless, you can adapt almost any lens to any mirrorless camera. Fujifilm makes a dedicated adapter which lets you mount Leica M lenses on any of their X-series cameras. I’ve used M lenses on an X-E2 for years, and know of many who use them on Sony’s full-frame A-series cameras. The one caveat is color shifts and (with older cameras) some smearing in the corners with extreme wide-angles on a different-brand mirrorless camera. You’re usually safe with lenses 35mm or longer. Why does this happen? Lenses from one manufacturer weren’t made for cameras from another. Especially with wide angles, the light projects at very shallow angles onto the corners of the sensor. When angled light passes through more of the camera’s infrared sensor filter, some of the visible red light can also be stripped away. This can result in corners tinted noticeably blue-green, what event shooter and reviewer Sean Reid calls cyan drift. Camera makers have built-in corner corrections for their own lenses, which let you use the matching-brand wides with minimal problems. And they may have tiny lenses over each pixel to refocus light coming in at those shallow angles. That’s what Leica does with their digital M cameras. |
Use the Leica
Recent Comments