We got up at 0-dark thirty for an early flight from San Jose, California to Albuquerque. After the usual wait-in-your-socks routine at the gate, we found our seats.
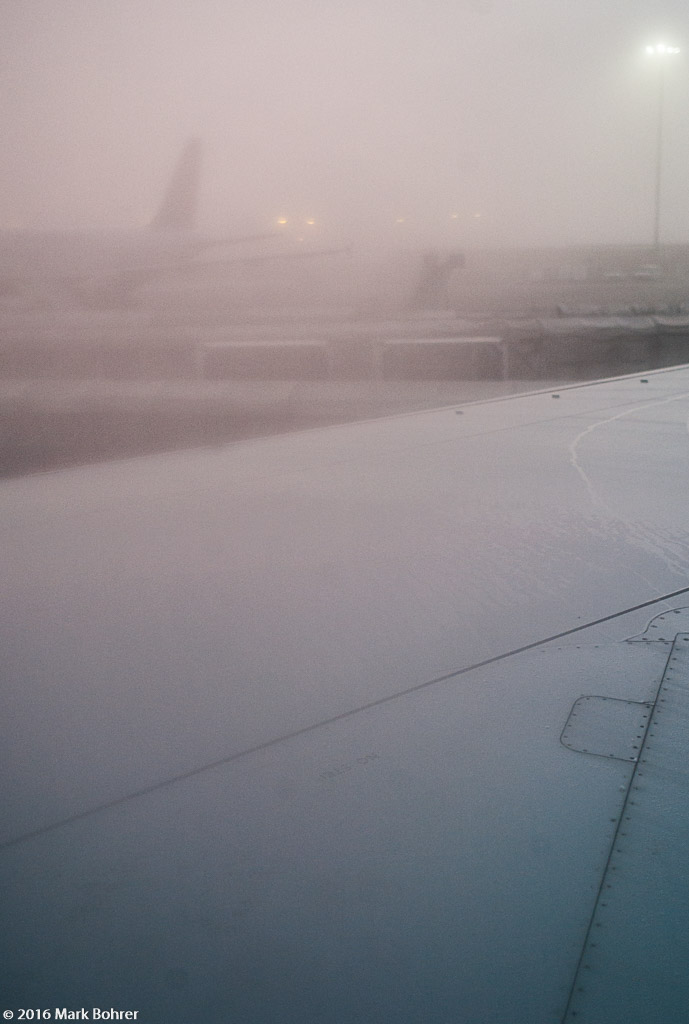
Foggy pre-flight at San Jose / SJC
At this point, there are a few options. You can try to sleep in your seat, strike up a conversation with your fellow passengers if they’re awake, pull out your novel and start reading, or pull out your cell phone and tell the sales rep at the other end your plane’s going to be late.
What I Look For
I can’t sleep on airplanes, so I usually pull out a camera and look for slices of airport life. There are a few things I watch for:
1. Baggage handlers loading planes, hot-rodding baggage carts or talking to each other
2. Other airplanes taking off or landing (this gets exciting if they’re really close)
3. Strong lines and shapes from aircraft tails, airport towers and terminals
4. Young passengers peeking around the seat ahead of me while they wait
5. Unusual light or shadows
6. A clean window to shoot through (scrubbed with my sleeve if necessary)
Seats For Best Shots
I try to reserve seats away from the wing on the side that’ll be away from the sun during the trip. This minimizes glare and gives me a clear view out the window I’m shooting through.
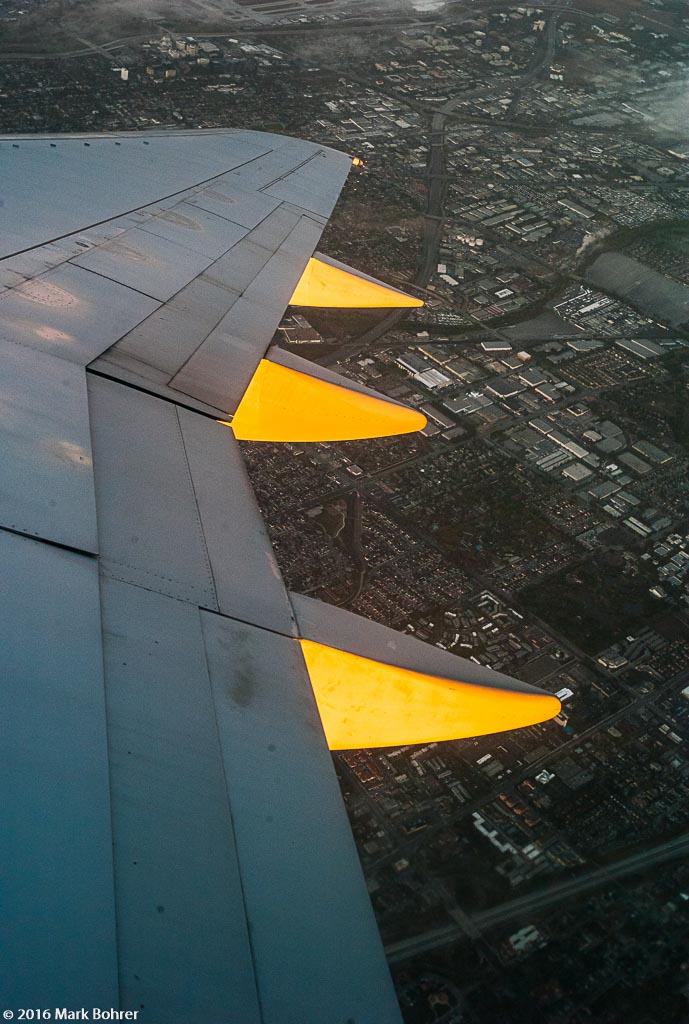
Banking after takeoff – sunrise light
This time, fog blanketed my view and gave a dreamy quality to the (unavoidable) wing, lights, and other planes. I put on a normal lens (45 degree angle of view, the middle of most small cameras’ zoom range) and started shooting.
The best aerial photo ops come near takeoff or landing, when the plane is closer to the ground. I prefer late fall or winter sunrises for their long-lasting light and color. I got stuck with the wing, so I used it to frame my pictures and reflect the sunrise. The fog dimmed the sky for a better exposure match to mountains and suburban sprawl on the ground.
The pre-takeoff picture didn’t have as much color as I usually like, so I rendered it in black and white. After takeoff, the orange sky painted wing and ground textures to make them worth looking at.
So what should you never do before takeoff?
Never worry about flying.
Other Preparation
You carried on your laptop and cameras (you did, right?), so all the expensive stuff won’t go to Missoula or Syracuse with the rest of the lost baggage. You got on the plane with your business associates, wife or friends, so you’ll all arrive at the same time. If you were really worred, you and your business associates booked separate flights. And most pilots flying routes between major hubs get paid well enough to do a safe job.
So relax and enjoy it. If something happens there’s not too much you can do anyway, except keep shooting all the way down.
Shot Notes –
For travel, I pack the dSLR gear in a Think Tank Airport Security v2.0 rollie bag. It fits in all U.S. domestic carriers’ overhead bins, and saves my back from a 40+ pound load. On planes, I shoot with a Leica M8 and 35mm f/2 Summicron-M ASPH or 50mm f/1.4 Summilux-M lens. The Leica is smaller than my EOS dSLRs, so I’m not crowded by equipment in Economy Class seats. A cheaper alternative would be something like my wife’s Canon G10.
With dense fog, you’ll be enhancing contrast in post with Lightroom or Photoshop. In Lightroom, play with the Shadows, Darks, Lights, and Highlights sliders. Sliding Shadows and Darks negative usually improves a flat picture. Adding Clarity will also tease out more detail without screaming, “I touched up in Lightroom!”
|

A friend has a computer that turns itself off after a certain period of time of inactivity. And all you have to do is move the mouse a little, and the computer comes back on. Maybe the computer is not completely off, maybe this is called hibernate or standby or something. Is this a good thing to do or should I just let my computer run? How do you get the computer to do this auto shut off thing as I described at the start of this paragraph?.
You can change your computer’s sleep mode behavior in the Windows control panel’s Power Options, found by clicking Start Button -> Control Panel -> Power Options.