|
“Politics and poker, politics and poker Shuffle up the cards, and find the joker…” Tom Bosley in Fiorello! Architecture & Ruins – Like Politics & Poker Architecture and ruins photography are understandably related. Ruins were once architecture, like politics originally owed a lot to backroom poker games. You can use similar techniques for both subjects, but there are some tricks to making it more consistent than an honest poker hand: 1. Don’t try to get it all in. There’s the natural temptation to slap on an ultrawide zoom, crank out all the way, and let ‘er rip. But when you want to show off those great pictures on your tablet or mobile phone, all the small details become featureless mush. You’re much better off showing smaller pieces of that imposing building – suggesting the whole thing. 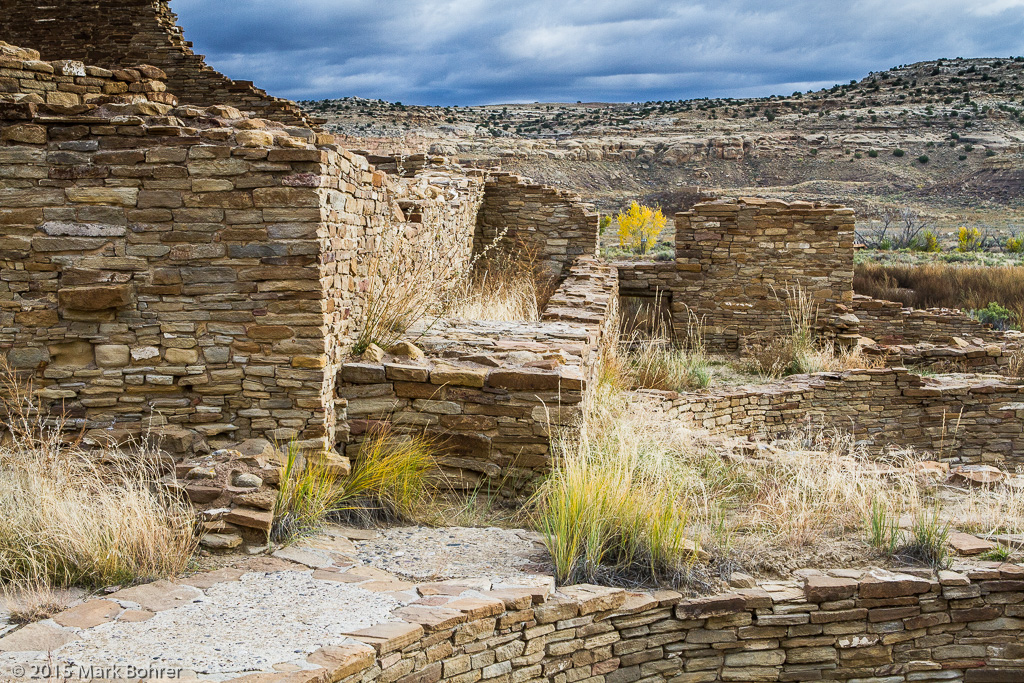 Walls, Pueblo Bonito, Chaco Canyon, New Mexico 2. Try to avoid tilting the lens back for tall buildings. I know, sometimes you can’t back up. You have to tilt the camera to get all of something tall. This can make buildings look like they’re falling over, a bit disturbing sometimes. Here, you can do a few things:  A. You can pick one strong vertical line (usually the closest one or near the picture’s center) and keep it vertical, making sure the horizon stays horizontal. B. You can shoot extremely wide and loose, and correct perspective in Lightroom’s Develop screen using the Vertical slider in the Lens Corrections’ Manual tab. You’ll need a lot of space around your subject for this, to avoid cutting the top off when you correct and crop to get rid of the white space this makes at sides and top. 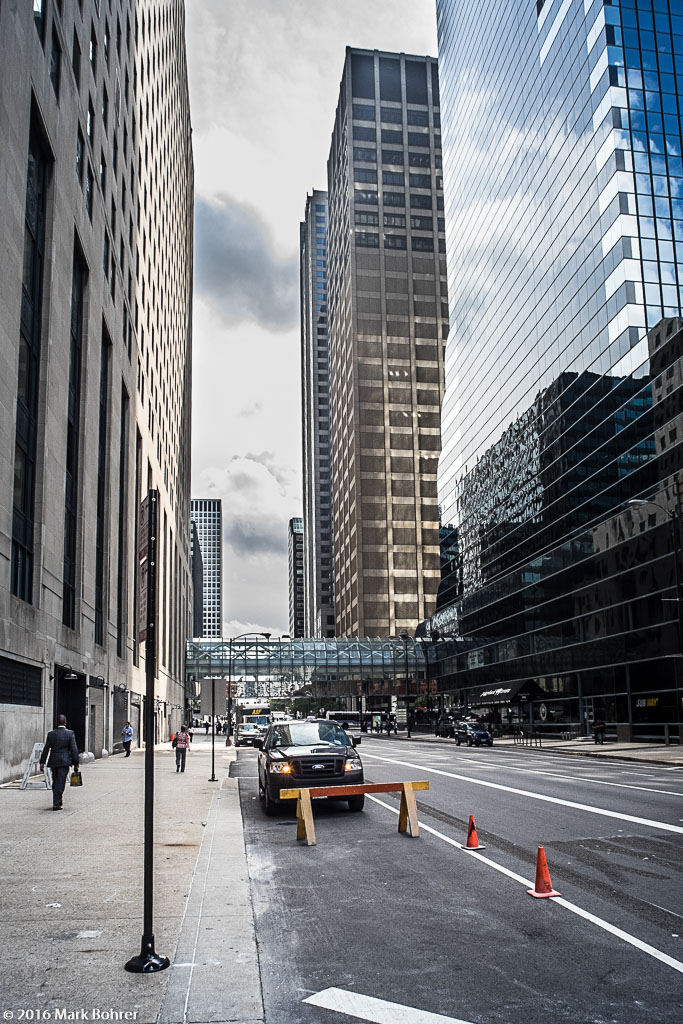 Near Wacker Drive and Wells, Chicago, IL Voigtlander 15mm f.4.5 Super-Wide Heliar on Fuji X-E2 – Loose shot with strong central vertical, partially corrected in Lightroom C. You can use a PC (Nikon) or TS-E (Canon) perspective control / tilt-shift lens. These guys duplicate the shift movements view camera photographers use, letting you get a tall structure in while keeping all your verticals, well, vertical. You aim the camera at your subject, keeping it straight, and shift the lens up until you get the vertical coverage you need. Canon’s latest TS-E offerings are a bit pricey, but an older used 24mm f/3.5L TS-E can be had for less than $1000. The only catch with one of these is the need to manually focus on the most important detail, then stop down to get good image quality and sharp focus across the frame. 3. Make sure everything is sharp. There’ve been countless times when I thought I had great shots, then discovered critical corners aren’t sharp when I edit in Lightroom afterwards. Always use the depth of field preview button to check. With manual focus primes on mirrorless cameras, I’ll be stopping down manually anyway, and a lens’ old-school depth of field scales give me a double-check. 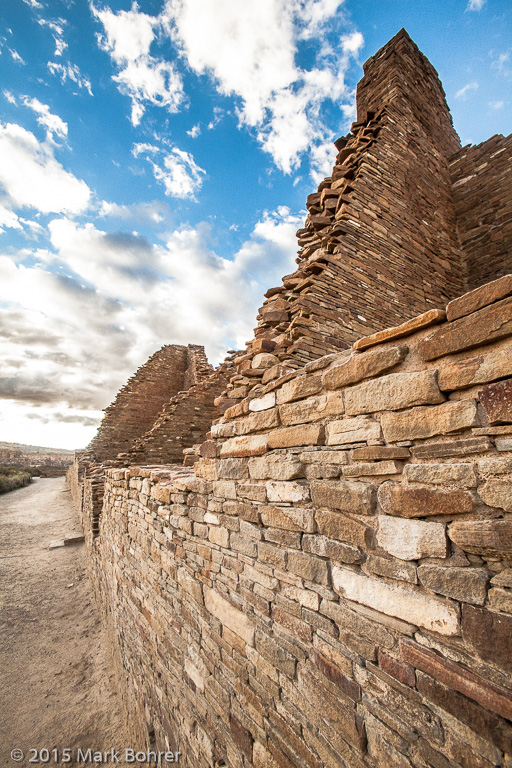 Pueblo Bonito wall into the distance, Chaco Canyon EF 16-35mm f/2.8L at 16mm on EOS 5D mk II Near bricks are less than 3 feet away, yet everything is sharp to infinity. 4. Use a tripod if you have space. Yup, they’re a pain to carry – even carbon-fiber ones – but they make you slow down and carefully consider what you’re doing. I use Gitzo 1127 and 1325 mk II carbon fiber models (no longer made) with Arca-Swiss and Kirk ball heads. They let me compose everything exactly the way I want, and check light, focus and exposure as slowly as I want – provided the light isn’t changing too rapidly. I also have lens and camera plates from Really Right Stuff on all my gear. These let me slide things together quickly, and I can compose vertically without flopping the ballhead over. 5. You may get away with an ultra-wide view of a large, unified structure like a Great Kiva. These usually benefit from picking a dominant foreground feature like sandstone foot-drums or walls. Any wideangle view can use a strong foreground feature and elements to lead a viewer’s eye through the picture. 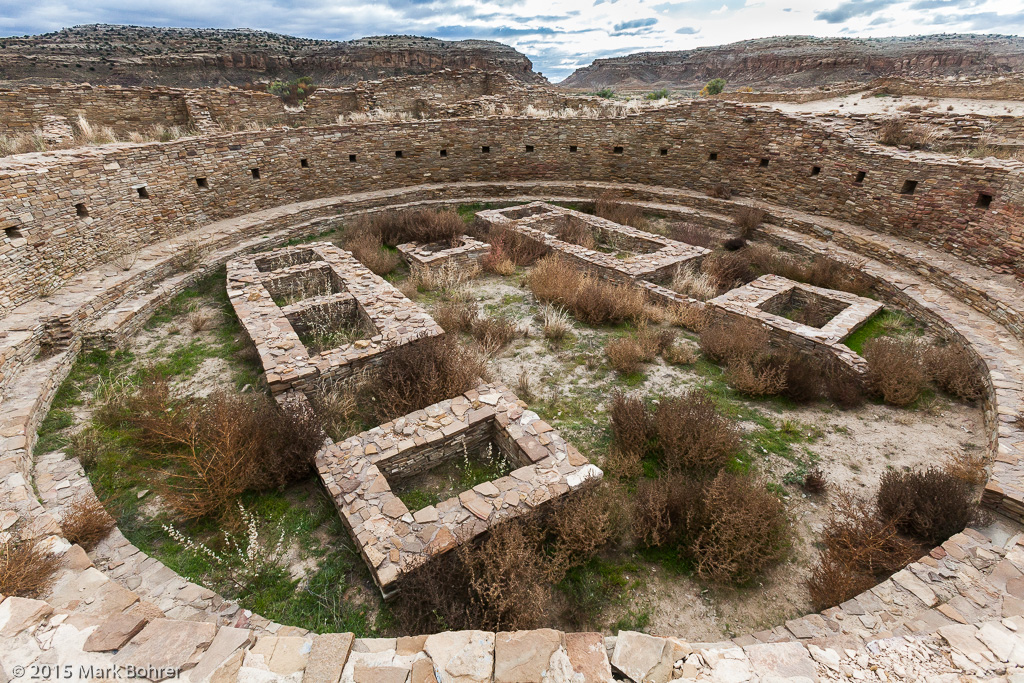 Great Kiva, Pueblo Bonito, Chaco Canyon, New Mexico What I Use I use a full-frame 16-35mm lens for large features like Great Kivas, where I can pick a dominant feature and leading lines or curves. I’ll also shoot smaller pieces with a 24-70mm or 24mm TS-E to give myself different views to choose from later. In rare cases, a 70-200mm telephoto zoom helps me pick out details, but this is usually better for distant landscapes near ruins, like Chaco Canyon’s Fajada Butte. The catch is bringing what you need without straining your back. I’ll pick the 16-35mm and 24-70mm, then pack a mirrorless Fuji X-E2 with Canon FD 100-300mm f/5.6L or Leitz 135mm f/4 Elmar (for a 203mm full-frame view). This weighs a bit less than the EF 70-200mm f/2.8L IS. Carrying It I’ll use a dSLR holster for an EOS 5D mk II and 16-35mm f/2.8L, with a belted case for the 24-70mm f/2.8L. I can fit the camera and 24-70mm in the holster, and the 16-35mm in the longer belt case. That way I don’t have to switch things to exactly the way I carried in when it’s time to move. The Fuji X-E2 and 100-300mm f/5.6L or 135mm f/4 El mar go in a separate, smaller fanny pack. Two belted cases strapped on at once is about my limit. Any more and I risk dropping or losing something when I try to take them off. A Leica M7 and three lenses in a third fanny pack disppeared this way in Santa Fe once. |
(408) 483-3782
Curious about how to shoot ruins?(408) 483-3782

Recent Comments