|
When I’m wearing multiple cameras and lenses in public, folks usually ask what camera is best. But the better question is, how do you get those great pictures, the ones you can’t take your eyes off of? Get the Cool Thing To Your Viewers It starts with seeing something intensely cool. What is it that sucks you in, and how do you capture it? Is it near or far away? Should you go closer? And how do you separate it from all the other junk around it? Distraction is everywhere. In this internet age of 5-second attention spans, you need every tool you can get to keep someone’s eye on your picture. Aperture First I usually begin with lens aperture. Small ones (big numbers, the lower part of a fraction) make it look like everything’s sharp. Large ones (the small numbers like 1.4 or 2.8) show your subject sharp and blur everything else. They’re what I use 90% of the time to pull a viewer’s eyeballs to a subject – my grand-nephew, my dog, or a grizzly I’m too close to. A lens projects a sharp image at just one distance – the distance you or your autofocus camera focus it to. Sharply-focused light hits your sensor as a sharp point. When the aperture is large (those small numbers again), the light that’s not focused makes large circular blobs on your sensor. Blobs don’t look sharp. But when the aperture is small (big numbers like 8 or 11), it makes unfocused light look like smaller circular blobs. If the blobs are small enough, your eye can’t tell the difference between them and the sharply-focused points. So your choice of aperture can either give viewers an entire sharp scene to look at and lose them in 5 seconds, or force their attention to just one thing in it – what you focused on. Keeping those viewers is your job. 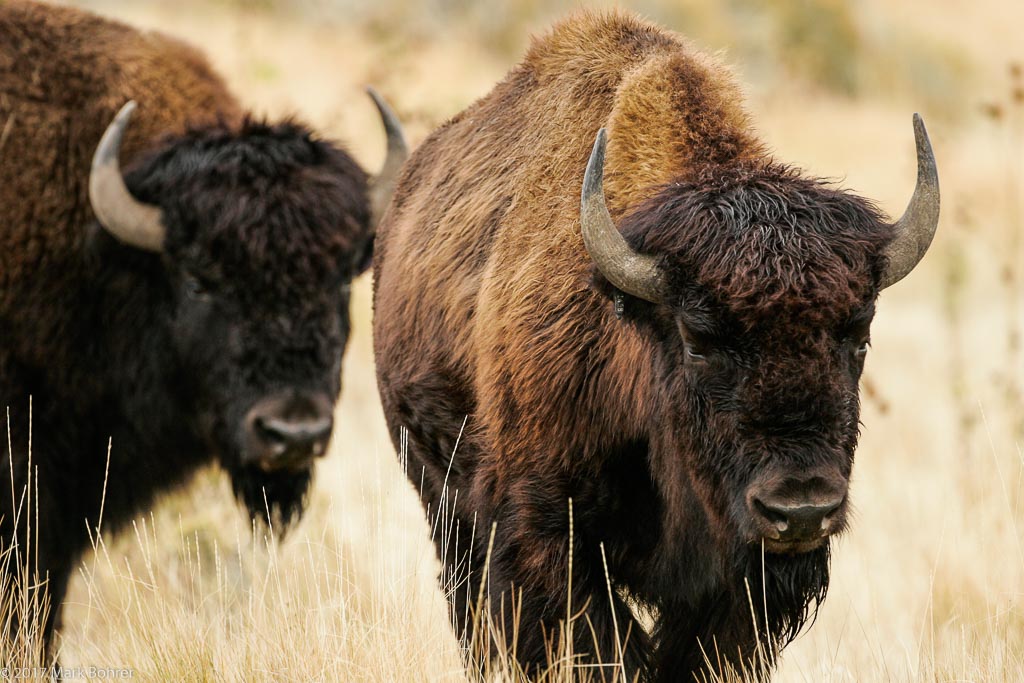 Bison, Antelope Island State Park, UT – large aperture – right-hand bison I focused on is sharp, left-hand bison farther away is blurred, and distant background is very blurred with a 500mm lens near its maximum aperture. ISO – Sensitivity and Going Steady I shoot in many remote and rugged places, with minimal gear. That means handheld shots 90% of the time. After I choose aperture, how fast should my shutter speed be to keep my shakiness from blurring the shot? Exposing Perfectly To answer that, back to basics – your picture is correctly exposed at just one pair of settings. Since aperture and shutter speed both control how much light reaches the sensor, they need to play nice together. As your aperture gets smaller, there’s less light on your sensor, and you need to expose it longer – with a slower shutter speed. ISO is how sensitive your sensor is to light. It’s like spilling a full bucket you barely touch versus having to pick up and dump one that’s almost empty – higher ISO is more sensitive, and low ISO needs a lot of light. A high ISO lets you use a faster shutter speed to get the shot, without changing the aperture you just chose.  Maize cobs, Gila Cliff Dwellings National Monument, NM – handheld in dim light at ISO 6400 and 1/320 sec. Hold It! I can’t handhold a camera without blur below 1/30 second. After I choose an aperture, I set ISO to give me shutter speeds faster than that. The long telephoto lenses I use for wildlife add another problem – they magnify my subject, but also my shakiness. I’ll need to use an even faster shutter speed with one of them. I usually start at 1/(focal length). So if I’m using a 400mm lens, I’ll need at least 1/400 sec or faster to prevent blurry shots of that grizzly I’m too close to.  Grizzly, Jasper National Park – 400mm lens handheld at 1/400 sec – just sharp enough Get the Camera to Do It Faster I make the ISO choice quick by using aperture priority. I choose the aperture first (usually large), then see what shutter speed the camera gives me. If it’s too slow, I change ISO until it’s fast enough to hold. dSLRs and most mirrorless cameras use ‘A’ or ‘AV’ to choose aperture priority. A Few Words About Autofocus Autofocus is great. I’d throw away a lot more bike race and raptor shots without it. But in the days before AF, I knew exactly what I focused on – my eye chose it. Unless you make a conscious setting, today’s cameras choose it in AF. dSLRs and most mirrorless cameras give you a choice of autofocus points. You can select a point to one side for a sharp racer or hawk moving into your picture, or a center point for that vertical portrait of your sister. This requires a bit of anticipation – what line will most downhill bike racers take through that muddy S-curve? And where do I want them in my picture? Setting It Up dSLRs have a button or switch to choose the AF point they’ll use. You’ll have anywhere from 9 to 63 points sprinkled across the frame, usually concentrated near the center. I like off-center points. In a horizontal picture, a centered subject looks like you lined it up in the crosshairs before shooting it. Giving a grizzly room to move into the frame looks more natural. It’s also safer! 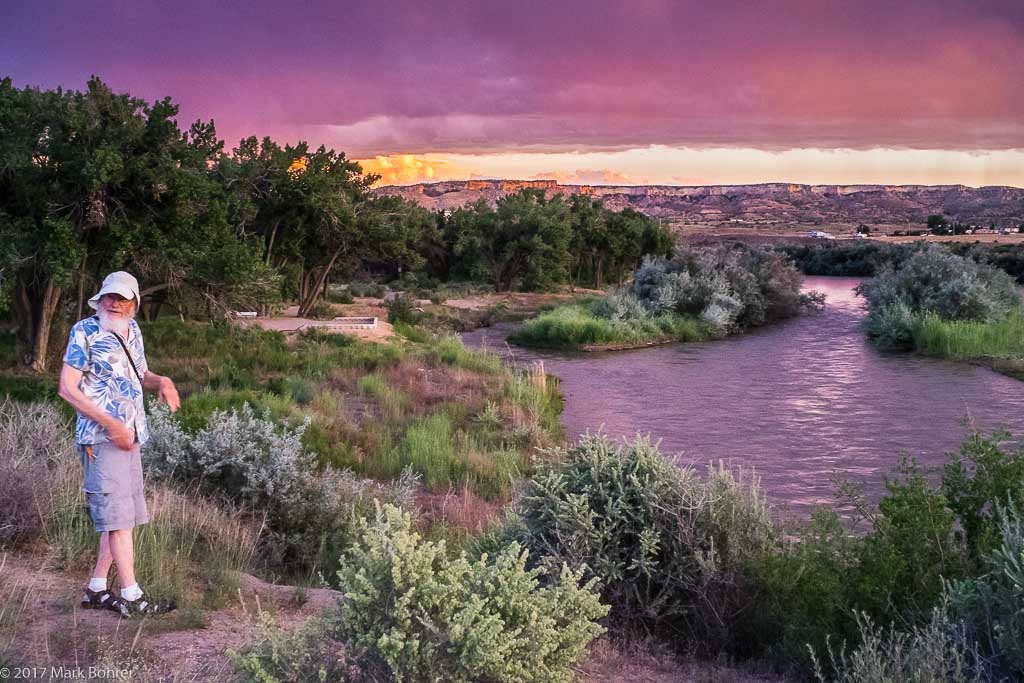 David and sunset color, Farmington, NM – handheld in dim light at ISO 6400 and 1/55 sec. Stationary trees and landscape are sharp, but David was moving so he’s slightly blurred. ISO and Noise If that full bucket sits in a puddle, you’ll barely notice spills around it. For high ISO, camera noise shows up way more compared to the small amount of light coming in. In early digital cameras, the noise could hide your subject. You’d be asking, “Is that a bird or just noise?” Recent cameras have better built-in noise erasers, but they can also steal some sharp detail with the noise. So see what your camera does for big ISO numbers, and avoid them unless you really need them to get the shot. |
(408) 483-3782
Curious about how to shoot ruins?(408) 483-3782
Recent Comments