|
You’ve seen those house-for-sale pictures the broker shot with his cell phone – you know, darkly-shadowed house that looks haunted, empty flat interiors, giant rooms that turn out to be phone booth-sized? But add some small flash lighting, and those awful houses transform to covers from Architectural Design. The same methods can bring ruins and small landscapes from yawn to intense wow. I was asked to shoot a house exterior by a local broker when he realized he needed something better for his listing. 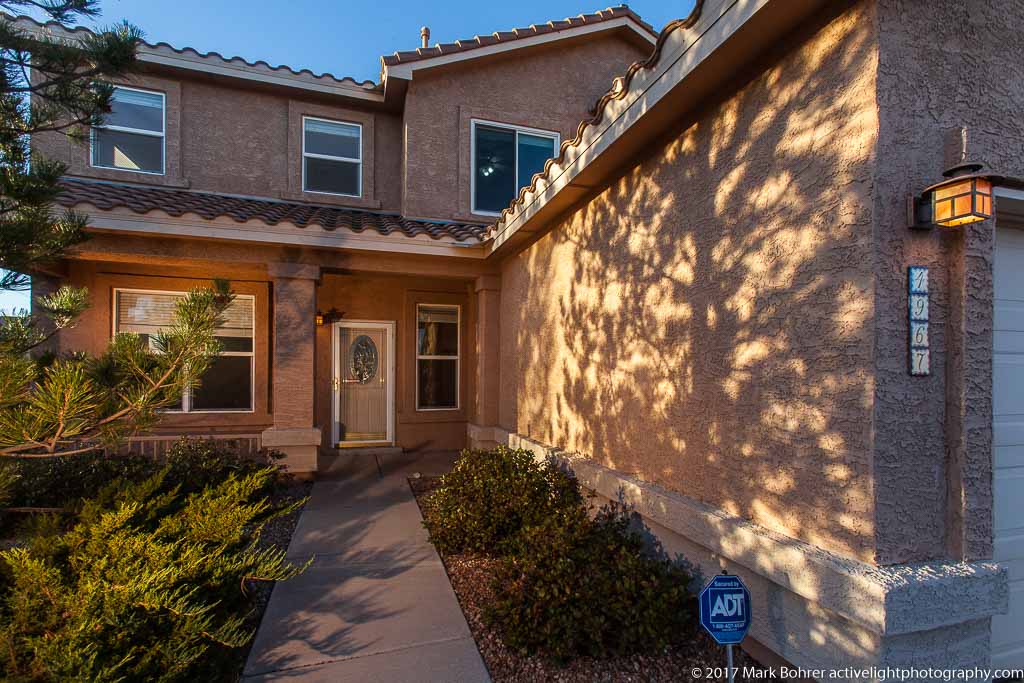 The lit house exterior – one 430EX flash on the porch, one more on the trees Make Your Own Warm Light on a North-Facing Scene I’d requested outside lights to be on for me when I arrived at sunrise, and the broker also left some inside lights on. I’d visualized a lit north-facing porch with fill from the sunrise sky. But I didn’t get as much light from that south-easterly sunrise as I wanted. So I added my own from 430EX flashes on lightstands, remotely triggered from the camera. I ‘saw’ more light on the front porch than the porch light provided, so I velcroed an amber gel over one flash to match the porch light’s color, hid it on a stand behind a post, and aimed it at the porch ceiling. Then I noticed the front yard trees were dull, so I placed another amber-gelled flash to ‘paint’ them from the side. 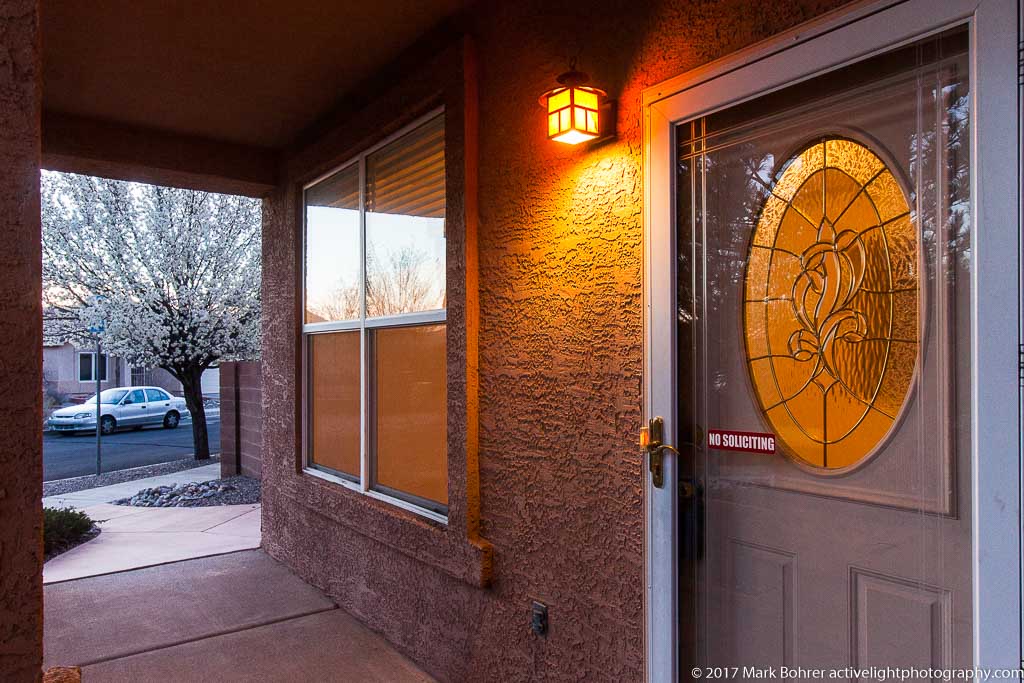 Porch and blossoms Invite the Viewer In With Light I’ve talked a lot here about inviting the viewer into the picture. Sometimes I do this with light. The walk to the side yard led around an unseen corner, and without light it looked like you were heading into a dark alley. Bouncing remote flash off the unseen wall made that walk much more enticing, especially since a picture’s bright spots suck the viewer’s eye right to them. 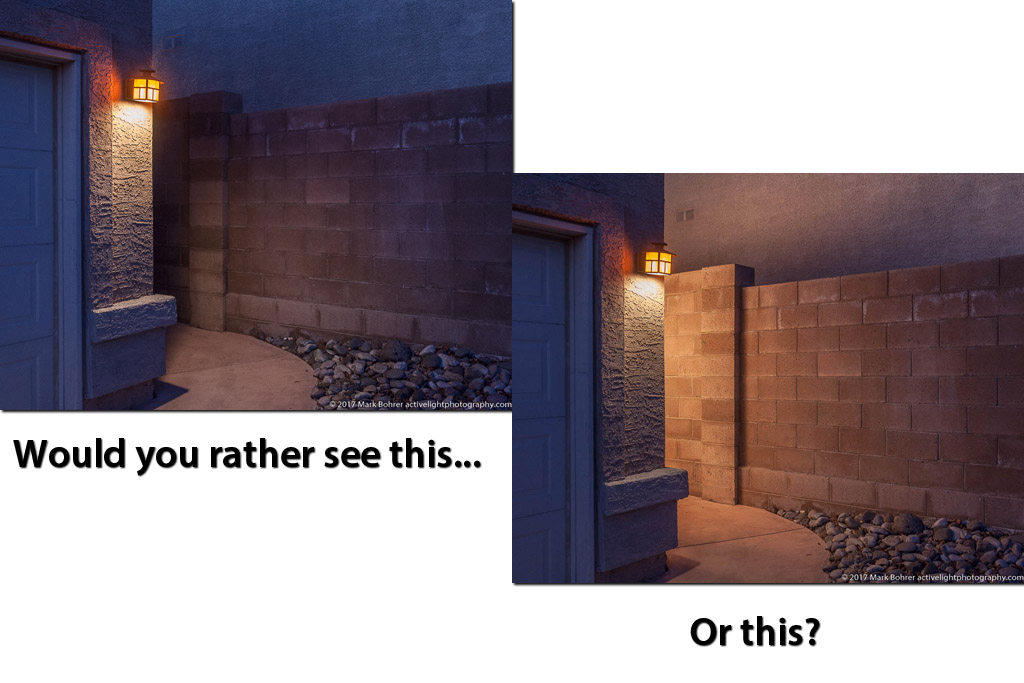 Expect blown highlights with bright porch and house lights in the picture. The most you can do is reduce exposure enough to capture some of their detail, light some of the surrounding dark areas, and let the brightest spots go. But there are ways to get a better balance between daylight and your flashes – more about that later. Keep Those Verticals From Tilting Tilting vertical lines look unrealistically weird – they’re not what our eyes see. There are a few ways to get rid of them in pictures. I mostly used a 16-35mm f/2.8L for the wide coverage I needed, but no zoom is a tilt-shift lens. That meant tiliting the camera up (or down) to capture the full height of a two-story house. I shoot loose to allow perspective correction later in Lightroom, since it always eats space in the picture. There were places where I could get away with less coverage, and I used a 24mm f/3.5L TS-E’s view camera-style shift adjustments. A lens shift lets you increase coverage without tilting the camera, keeping parallel lines parallel.  Living room view Shoot Those Unexpected Opportunities Inside the house, I’d visualized light from the stairs shining down into the living room. I lit an additional dark area behind a low living room wall, and added light from a doorway into the dining room. 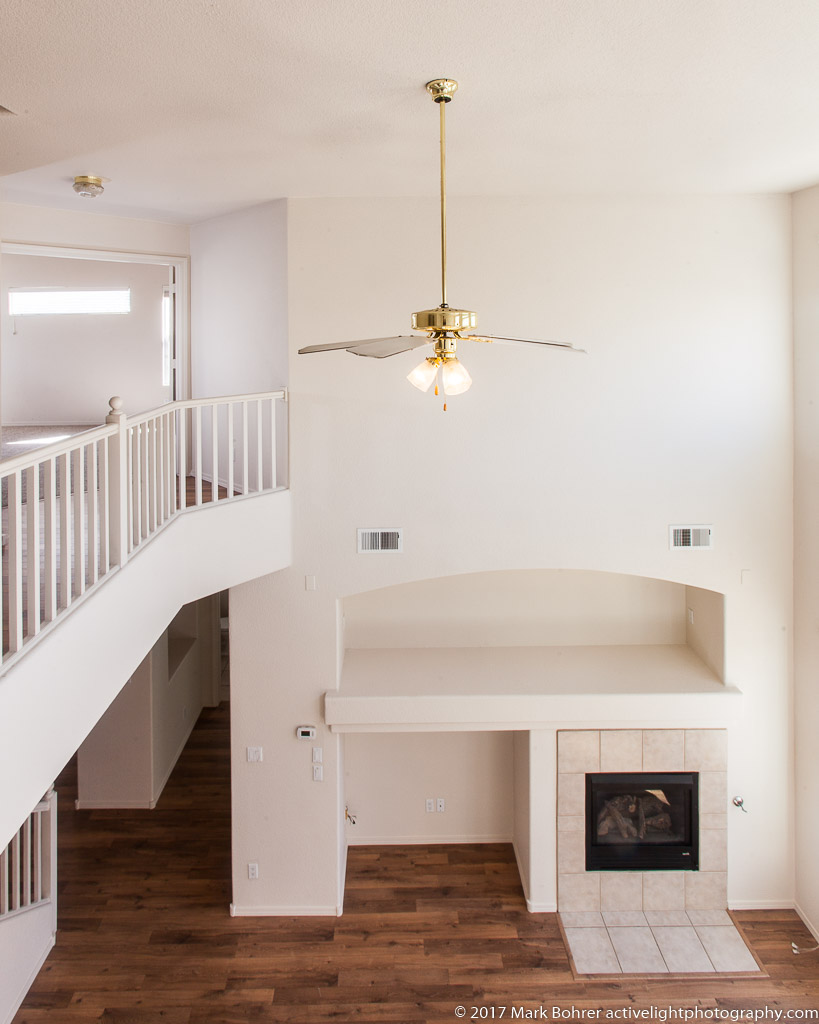 Great room from upstairs What I didn’t expect were the opportunities upstairs. The view down to the fireplace from the upstairs foyer really made the house, so I looked for a shot I could correct completely, matching the apparent size of the interior to what a client will actually see. It was too wide to shift with the 24mm TS-E, so I had to tilt the wide zoom at 16mm. I was able to get the shot I wanted by leaving out the upstairs railing, still showing the spaciousness from above. I lit dark upstairs walls to match the overall look. 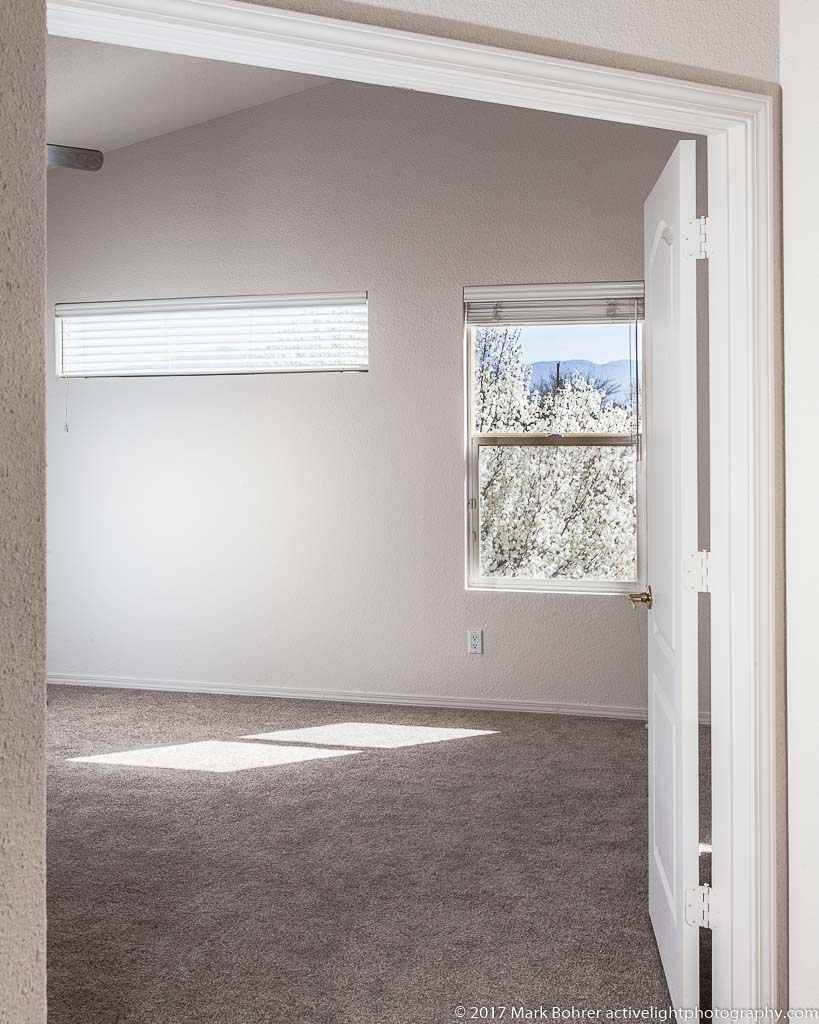 Master bedroom blossom view Balancing Window Light to Flash Then I saw the view of blossoming trees out the master bedroom window. I used two flashes to light up the door and walls, enough so they didn’t go completely dark with an almost-outdoor exposure for the window view. Then I underexposed slightly to avoid blowing out the blossoming highlights. I recovered the darker interior and toned down the outside highlights in Lightroom to get what my eyes saw. (I shoot RAW for 64X more light range – that lets me recover highlights and shadows in Lightroom.) The window was north-facing, and that reduced the light coming in to make it easier to balance with the flashes. 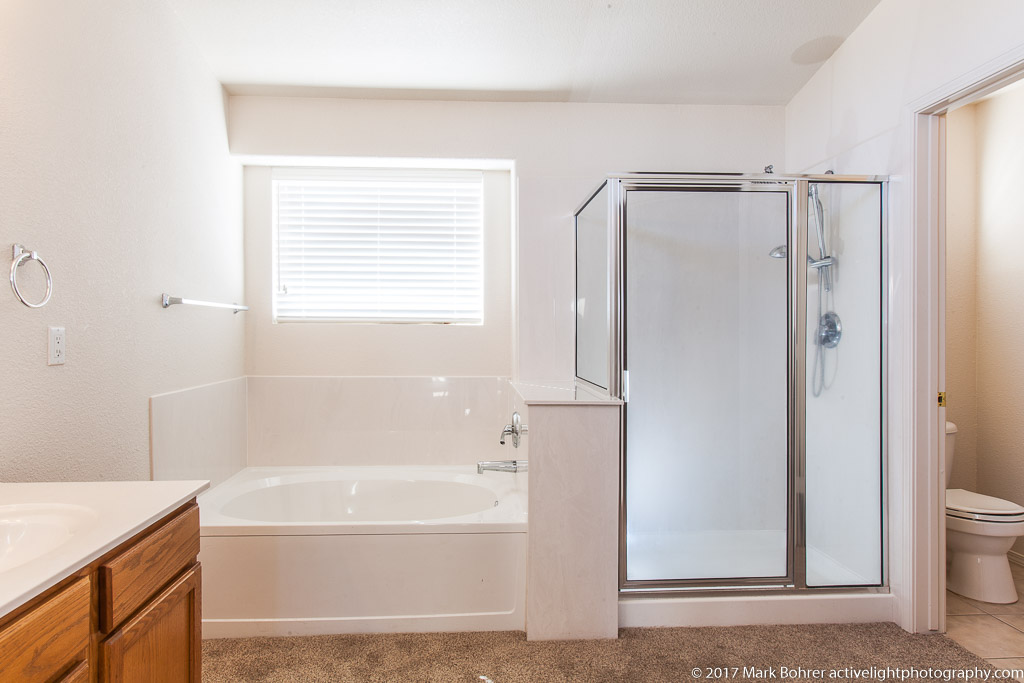 Flash in the shower More Painting With Flash Then the master bath. I put remote flashes in the bathtub and shower to accent them, and one more in the walk-in closet. Then I adjusted window shutters over the bath and the toilet to tone down hot highlights from outside. Between the lights inside and the closed shutters, I got an even exposure. Don’t Waste Weak Daylight Remote-triggered flash lets you accent areas like a painter would in a landscape. This works when daylight is less intense near sunrise (or the scene is well-shaded). Wait too long and you’ll need those big plug-in studio flashes to overpower it. Near sunset or sunrise, you won’t have more than 15-20 minutes of subdued daylight, and it’ll be constantly changing. That may sound like a lot of time until you start concentrating on shot design and light placement. 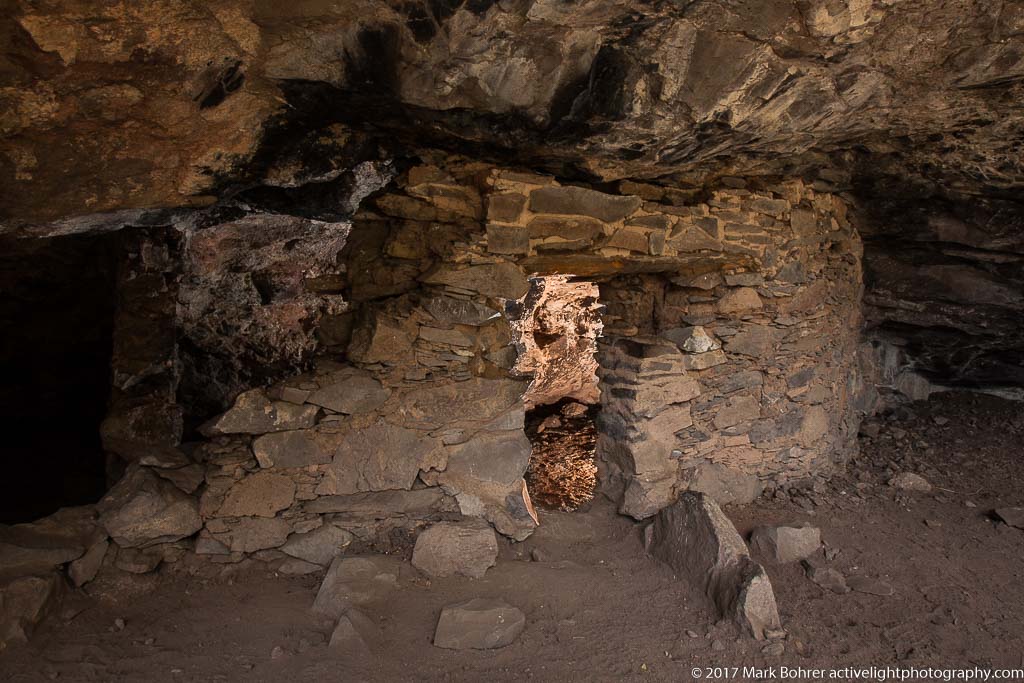 Lower Scorpion ruin, Gila Cliff Dwellings – 430EX flash inside for that ‘lived-in’ look You’ll make best use of that time if you’ve pre-visualized what you want before you even get there, and shoot the most important stuff first. What’s most important? When you’re shooting for you, it’s your call. Ask yourself what story you’re trying to tell, and that will guide you. I wanted to show how nice it was to walk around the property, and also to invite the viewer inside. Light behind the front door helped do that in closeups on the front porch. |
(408) 483-3782
Curious about how to shoot ruins?(408) 483-3782

Recent Comments