Skip Lightroom – But Get It Right In The Camera First | Active Light Photography | Photo Tours to Hidden Destinations, Anasazi Ruins
(408) 483-3782
Curious about how to shoot ruins?(408) 483-3782
Can you be a good photographer without knowing about photo editing?

The simple answer is yes, but –

Learn to get it right in the camera. Pre-visualizing your subject’s activity, how it will look in great light, and figuring out when and where you will get that light, will let you do this.

Then you need to focus on and expose for your subject’s most important detail. This is usually the near eye for a human or wildlife subject, or the thing that made you say ‘Oh, wow’ in the first place when you decided to go for the shot. Remember that great light alone isn’t enough – there needs to be something interesting in that great light to keep your viewers looking at the picture. I’ll talk some more about this and other essentials of shot design in later posts.


Advertisement


Simple Enhancements With Photo Editors

That said, you can really enhance your visual story with simple photo editing. Starting with a great raw image file (you did shoot raw, didn’t you?), Adobe Lightroom gives you tweaks for contrast, color and simple cropping. Even the best cameras may not always nail white balance, and your eye-brain combination may amplify contrast your camera may not natively ‘see’. Editing software lets you enhance the raw file.

An inexpensive previous version of Lightroom (version 4 or later) will have all you need to make basic edits. It’s relatively easy to mess around with the tool and discover what works for you.

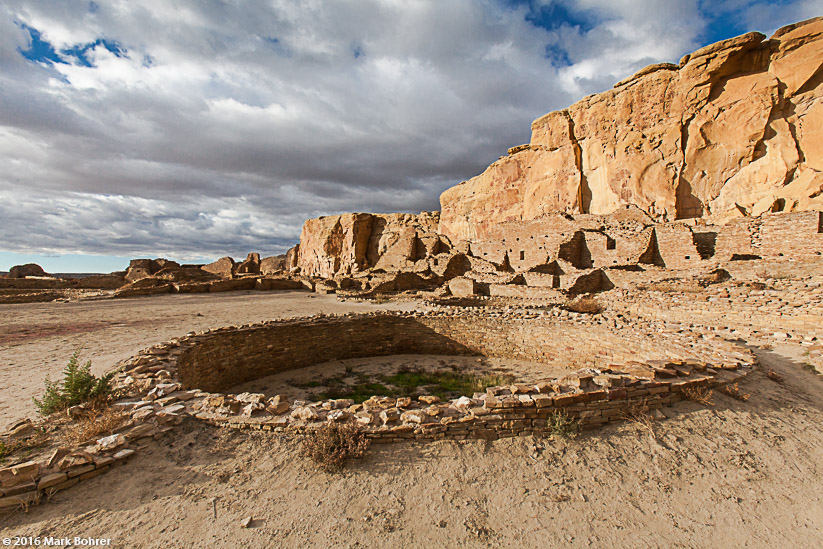
This capture from Pueblo Bonito’s plaza needed almost no help – the only changes were mild contrast enhancements.


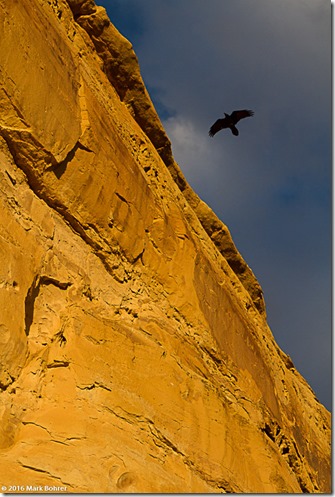
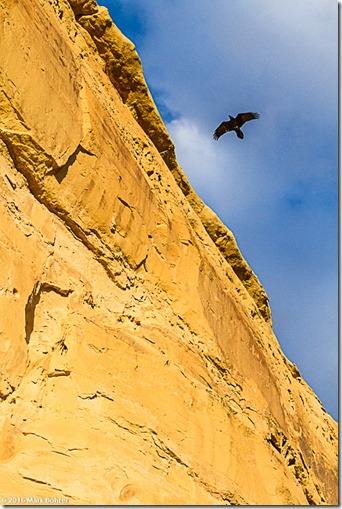
But many times I’m not so lucky. I liked this well-composed RAW capture of a raven flying over Chaco Canyon. But it needed some technical help.


Raven, North Mesa

Raven, Chaco Canyon – As shot from the camera

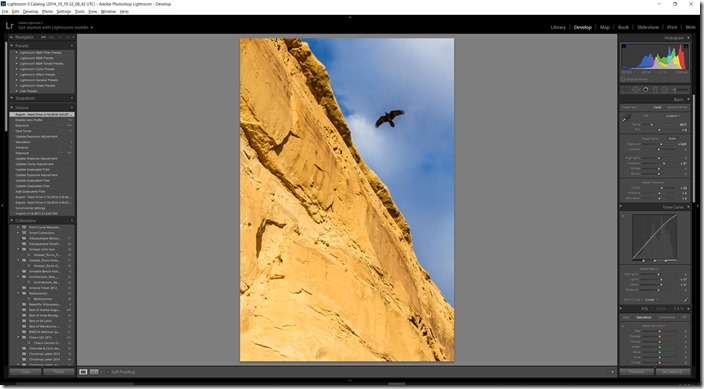
Before you do anything else, select Lightroom’s Develop section. Then click Settings and make sure you’ve set Update To Current Process (2012 at this writing). That gives you the most effective developing tools. If it’s already set, it’ll be greyed out.

Screenshot - after Lightroom treatment

Lightroom Develop screen

Most of what I do in Lightroom is:

1. Crop. Many times, I’m forced to shoot loose or with the wrong lens in a fast-breaking situation, or I don’t get the framing quite right. Type R to bring up the crop tool to fix this.

2. Adjust Clarity. In the ‘Develop’ section, this is a mid-tone contrast enhancer that can make details ‘pop’ without muddying shadows or blowing out highlights. It’s my most-used adjustment beyond cropping.

3. WB (white balance). Some cameras like the Leica M8 give me overly cold (blue)-toned colors in their auto white balance setting (AWB). Or the camera’s AWB just misses in some situations. Again in the ‘Develop’ section, I’ll adjust the Temp slider cold or warm until it looks a bit better. If flesh / face tones are biased too green or too red, I’ll adjust them with the Tint slider.

4. Tone Curve – Region – Lights. Adjusted slightly upward, this one can give some photographs a ‘glow’ that brings them more to life. But I use it sparingly – it’s all too easy to blow out highlights.

These four are my usual starting points. I’ll sometimes add vibrance and saturation, adjusted to no more than 9 each to make colors pop. This reminds me a little of the colors I used to get in Kodachrome slide film.

Fix Those Skies

Because skies usually end up a bit too bright, my next stop is the half neutral density filter. I access this by pressing M. I usually start with -0.75 and slide the mask down to an obvious horizon line. With practice, you’ll reach the point where you’ll apply it to other areas that come in too bright. With raw files, there’s a lot of detail you can recover in those bright spots.

Raven, North Mesa

Raven, Chaco Canyon – After Lightroom editing –
Adjustments to White Balance, Shadows (Tone), Clarity, Vibrance, Saturation, Lights, Darks (Region) and Half Neutral Density Filter (right-hand corner)

Practice

It’s really all about practice with your camera – that will make you a good photographer. Good photo editing software helps you tell the visual story better, and lets you file and locate those great images after you shoot them. But there’s no substitute for shooting subjects you’re passionate about. And shooting a lot.


Get free travel photography tips every week –

Subscribe to The Story Behind The Picture here.

Website and email
Please check out the Active Light Photography home page or contact me at